Thingiverse
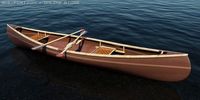
4" PVC Tube Canoe Outrigger Kit by dirtybirdnj
by Thingiverse
Last crawled date: 3 years ago
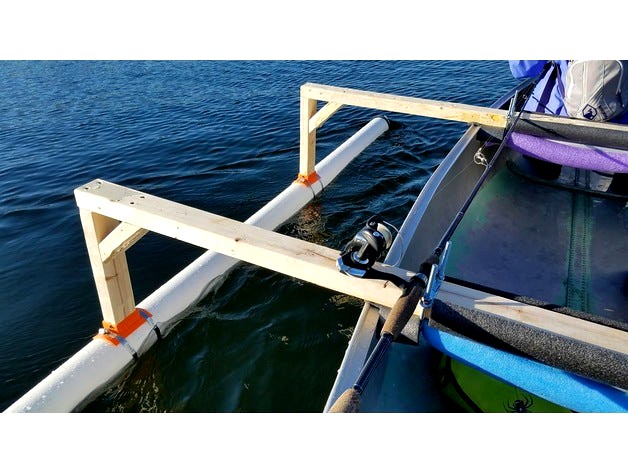
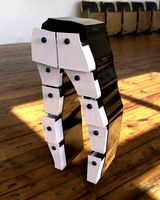
This is a collection of parts for making outriggers out of 4" PVC tubes you can find at your local big box hardware / home improvement store. The design is purposefully made to work with easy to find off the shelf parts. I want to make it easy for anybody to turn an old canoe into a much more safe and enjoyable experience.
This is a great way to make a canoe more suitable for fishing as well, if you plan on attaching a trolling motor this kit is designed to provide the added stability and buoyancy required to account for the weight of two people plus a deep-cycle marine battery and trolling motor. This is actually the reason I decided to design the parts, and I'm still in the progress of finishing up the first version so this is a live and breathing project... subject to updates so check back often if you like it.
Warning: Users of this guide take must 100% responsibility for the safe operation of any craft that uses the parts or guide.
I'm going to be really mad if someone goes and kills themselves with a boat they made using this plan... it may not be a gun but do not underestimate the danger of a vessel you make sinking and either stranding you or putting you in a dangerous or life threatening situation. Make sure to test your setup in a safe and controlled environment before you embark on any longer journey. Test with one person before you test with two... use your best judgement and always be willing to try again to make sure it's built sturdy and correct before you put your or someone elses life in danger.
Now with that buzzkill PSA over... let's get to the fun part!
Process: (First Draft, more details soon! 5/19/18)
Cut down your stud wood to estimate how far out you want your outriggers from the boat sides. I would start with 60" if you are unsure, but the best thing is to put the uncut piece of stud on the boat and look at it to determine what makes most sense.
DO YOUR RESEARCH ON THIS ONE! Here's the type of thing you should be researching:
https://wavewalk.com/blog/2009/02/25/how-effective-can-a-fishing-kayaks-outriggers-be/
Figuring out how far the outriggers should be out isn't rocket science, but put some effort in and be rewarded with comfortable stability.
Once your first horizontal stud is cut, put it on the boat and try to hold the boat level. Measure the distance from the stud to the floor / ground that the boat is on. You will need to cut two pieces of wood roughly this size per each cross bar. If you don't do this step right the canoe will be stable but still have some undesirable tipsiness before the outriggers actually get in the water. The goal is to have the outriggers at the level of the water that the boat rests naturally at when normally loaded.
Once you have your cross bar and down bars cut, use the 1" or other screws you have to attach them at a 90 degree angle. You may want to add an additional piece to brace the angle, but depending on how straight your cuts and screws were this may not be necessary. If you have any doubt, lean into it with your full weight. If it breaks, it wasn't strong enough... go back to the store and spend another $2.50 on a cheap piece of wood.
Once your crossbars and down bars are attached, cut the pool noodles so that they go over the bars you are going to use to attach the outriggers to the canoe. The foam should be in-between the wood and metal/plastic/wood or whatever the canoe is constructed of. Depending on your canoe you may or may not need this, but that's up to you.
Once your pool noodles are cut and wrapped around the bars, put your newly made cross bars over the noodles and use the U-Bolts to attach them to the cross bars of the canoe itself. Make sure the U is facing upwards, and that the flat bar of the U-Bolt is resting on the wood.
Using your power drill select a low number (between 1 and 20, choose 3-5) on the clutch setting and begin to tighten down the U-Bolts... alternating sides so you don't tighten one side 100% and then the other 100%. After you tighten all eight bolts (4 U-Bolts with 2 nuts per) your cross-bars are attached!
Take the 4" tube adapter and put it on the downward part of the outriggers. It should friction fit nicely... and might need a little force to go on but should not require hammers or any other more powerful application of force.
Avoid damaging the PVC tube adapters! Take care not to let the 4" tube adapters hit the ground while you are attaching the 4"pipe clamps. Just find someone to help you hold the canoe steady while you do this part to avoid the tipping that can ruin your day. It's very easy to bump the canoe and have it tip to one side and break an adapter. Ask me how I know this.
Slide the 4" pipe clamps over the PVC tubes, and then run them over the side shelfs of the 4" tube adapters. Use the other socket you bought and the power drill to tighten down the clamps. Again, take care not to use too much torque as this can break or destroy your PVC adapter.
----- Current Project Progress Point! 5/19/18
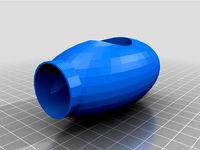
So I'm currently printing a full set of end caps, the first trial actually only used
one outrigger. It wasn't bad but it wasn't good enough either. Currently
we're just waiting for nice weather to go out and try the double outrigger setup!
Ok... back to the plan....
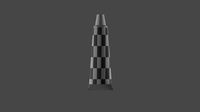
After printing two "tall cone" caps, and two flatter ones, insert them into the ends of the PVC tube. Use glue and/or marine adhesive spray to seal the caps onto your 4" PVC tubes. MAKE SURE TO TEST THAT THESE ARE WATER TIGHT BEFORE YOU GO TOO FAR WITH YOUR BOAT. Boy would it suck if you did a crappy job sealing this and your boat sank and took down all your fishing gear... just saying don't let this be you!
Congrats! You made it all the way to the end! Make sure you do a few dry-run assemblies of the outrigger setup in your garage / driveway etc, before you take it to try on the water for the first time.
Assembly Protips: When you use the boat for real, you will end up putting it together at whatever boat launch you use. Try to find an area that provides an extra parking spot for you to work in. Always have extra scrap pool noodle, the first few times you put it together you may realize additional places that need more padding.
Testing Protips: For your first voyage, don't go too far out or plan to be out for an extended period of time. Test with one person before you test with two. You most likely will need to adjust the positioning of both outriggers after your first trials to achieve proper weight distribution / buoyancy. Use a permanent marker to mark on the 4" pvc tube what works once you figure it out. Use your best judgement, listen to that voice in your head that says "maybe this is dangerous...". You can always try again tomorrow!
This is a great way to make a canoe more suitable for fishing as well, if you plan on attaching a trolling motor this kit is designed to provide the added stability and buoyancy required to account for the weight of two people plus a deep-cycle marine battery and trolling motor. This is actually the reason I decided to design the parts, and I'm still in the progress of finishing up the first version so this is a live and breathing project... subject to updates so check back often if you like it.
Warning: Users of this guide take must 100% responsibility for the safe operation of any craft that uses the parts or guide.
I'm going to be really mad if someone goes and kills themselves with a boat they made using this plan... it may not be a gun but do not underestimate the danger of a vessel you make sinking and either stranding you or putting you in a dangerous or life threatening situation. Make sure to test your setup in a safe and controlled environment before you embark on any longer journey. Test with one person before you test with two... use your best judgement and always be willing to try again to make sure it's built sturdy and correct before you put your or someone elses life in danger.
Now with that buzzkill PSA over... let's get to the fun part!
Process: (First Draft, more details soon! 5/19/18)
Cut down your stud wood to estimate how far out you want your outriggers from the boat sides. I would start with 60" if you are unsure, but the best thing is to put the uncut piece of stud on the boat and look at it to determine what makes most sense.
DO YOUR RESEARCH ON THIS ONE! Here's the type of thing you should be researching:
https://wavewalk.com/blog/2009/02/25/how-effective-can-a-fishing-kayaks-outriggers-be/
Figuring out how far the outriggers should be out isn't rocket science, but put some effort in and be rewarded with comfortable stability.
Once your first horizontal stud is cut, put it on the boat and try to hold the boat level. Measure the distance from the stud to the floor / ground that the boat is on. You will need to cut two pieces of wood roughly this size per each cross bar. If you don't do this step right the canoe will be stable but still have some undesirable tipsiness before the outriggers actually get in the water. The goal is to have the outriggers at the level of the water that the boat rests naturally at when normally loaded.
Once you have your cross bar and down bars cut, use the 1" or other screws you have to attach them at a 90 degree angle. You may want to add an additional piece to brace the angle, but depending on how straight your cuts and screws were this may not be necessary. If you have any doubt, lean into it with your full weight. If it breaks, it wasn't strong enough... go back to the store and spend another $2.50 on a cheap piece of wood.
Once your crossbars and down bars are attached, cut the pool noodles so that they go over the bars you are going to use to attach the outriggers to the canoe. The foam should be in-between the wood and metal/plastic/wood or whatever the canoe is constructed of. Depending on your canoe you may or may not need this, but that's up to you.
Once your pool noodles are cut and wrapped around the bars, put your newly made cross bars over the noodles and use the U-Bolts to attach them to the cross bars of the canoe itself. Make sure the U is facing upwards, and that the flat bar of the U-Bolt is resting on the wood.
Using your power drill select a low number (between 1 and 20, choose 3-5) on the clutch setting and begin to tighten down the U-Bolts... alternating sides so you don't tighten one side 100% and then the other 100%. After you tighten all eight bolts (4 U-Bolts with 2 nuts per) your cross-bars are attached!
Take the 4" tube adapter and put it on the downward part of the outriggers. It should friction fit nicely... and might need a little force to go on but should not require hammers or any other more powerful application of force.
Avoid damaging the PVC tube adapters! Take care not to let the 4" tube adapters hit the ground while you are attaching the 4"pipe clamps. Just find someone to help you hold the canoe steady while you do this part to avoid the tipping that can ruin your day. It's very easy to bump the canoe and have it tip to one side and break an adapter. Ask me how I know this.
Slide the 4" pipe clamps over the PVC tubes, and then run them over the side shelfs of the 4" tube adapters. Use the other socket you bought and the power drill to tighten down the clamps. Again, take care not to use too much torque as this can break or destroy your PVC adapter.
----- Current Project Progress Point! 5/19/18
So I'm currently printing a full set of end caps, the first trial actually only used
one outrigger. It wasn't bad but it wasn't good enough either. Currently
we're just waiting for nice weather to go out and try the double outrigger setup!
Ok... back to the plan....
After printing two "tall cone" caps, and two flatter ones, insert them into the ends of the PVC tube. Use glue and/or marine adhesive spray to seal the caps onto your 4" PVC tubes. MAKE SURE TO TEST THAT THESE ARE WATER TIGHT BEFORE YOU GO TOO FAR WITH YOUR BOAT. Boy would it suck if you did a crappy job sealing this and your boat sank and took down all your fishing gear... just saying don't let this be you!
Congrats! You made it all the way to the end! Make sure you do a few dry-run assemblies of the outrigger setup in your garage / driveway etc, before you take it to try on the water for the first time.
Assembly Protips: When you use the boat for real, you will end up putting it together at whatever boat launch you use. Try to find an area that provides an extra parking spot for you to work in. Always have extra scrap pool noodle, the first few times you put it together you may realize additional places that need more padding.
Testing Protips: For your first voyage, don't go too far out or plan to be out for an extended period of time. Test with one person before you test with two. You most likely will need to adjust the positioning of both outriggers after your first trials to achieve proper weight distribution / buoyancy. Use a permanent marker to mark on the 4" pvc tube what works once you figure it out. Use your best judgement, listen to that voice in your head that says "maybe this is dangerous...". You can always try again tomorrow!
Similar models
3dwarehouse
free

Canoe with outrigger
...canoe with outrigger
3dwarehouse
a basic wooden canoe with outrigger #boat #canoe #kayak #outrigger
thingiverse
free
Home AC Condensation Drain Line Vacuum Adapter by noslenwerdna
...m tube, this makes it so that you are not trying to vacuum out your entire ac unit by attaching a vacuum to the t-adapter itself.
thingiverse
free

Dryer vent cleaning (vacuum adapter) by guseval
...ide other end over the vacuum hose.
now you can use your vacuum to suction lint and dust from hard to reach places in your dryer.
thingiverse
free

3/4" PVC Flange by lolsborn
...giverse
flange for flush mounting 3/4" pvc. i use it for making air flags for quad racing using dollar store pool noodles.
thingiverse
free
Pool noodles foam adapter by macv36
...st want the "landing gear".
(i'm not responsible if your drone gets under water, test on very shallow water first.)
thingiverse
free

WTB Padloc MTB grip handlebar cutting guide by sjc115
...erse.com/thing:4280411) to make a square cut on the bars first (only needed if adjusting the length before making the angle cut).
grabcad
free

Outrigger Boat_IbrahimButt_532578_Castlebrooke
...d of material and was thoroughly designed to give the rider the experience of his life. it can't get more canadian than this!
thingiverse
free
PVC T adapter rounded by valarok
...pvc t adapter rounded by valarok
thingiverse
pvc t adapter for rov. fits 3/4 inch tube.
thingiverse
free

shisha hookah tube adapter by Xels21
...our shisha.
(i added a "bottom circle", so it doesn't fell over while printing. please remove before assembling ;d)
thingiverse
free

Outrigger Canoe Model by gtlloyd
... a friend who gifted these as trophies for an outrigger canoe club. they used a small amount of twine to form the lashings (aha).
Dirtybirdnj
thingiverse
free

Crutch Basket by dirtybirdnj
...this is a basket designed to fit in between the bars of a set of crutches. its designed to be printed in vase mode without a top.
thingiverse
free

Printrbot Simple Metal Bed Sensor Nut by dirtybirdnj
...hem easier to manipulate by hand
test_nut - this is the first test file to see what fits with the sensor. generated with openscad
Outrigger
3ddd
$1

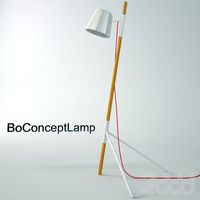
Boconcept Outrigger Floor Lamp
...rigger торшер.
информация:http://www.boconcept.com/en-ca/accessories/lamps/lamps/floor-lamps/3003/outrigger-floor-lamp
3d_export
$80

dump truck with elevator crane outriggers
...
dump truck with elevator crane, outriggers files format includes: stl, step, solidworks, sketch up, inventer, iges, 3d dxf, creo
turbosquid
$20

Base with MPT Short outriggers truss
...odel base with mpt short outriggers truss for download as c4d on turbosquid: 3d models for games, architecture, videos. (1383111)
3ddd
$1

BoConcept
..., вешалка , часы набор из предметов от boconcept! grip,metro,outriggerwatch ...
3ddd
$1
A-DIZ3dMODELS BoConcept lamp Floor
...a-diz3dmodels boconcept lamp floor 3ddd boconcept http://www.boconcept.com/en-us/accessories/lamps/lamps/floor-lamps/3003/3002/outriggerfloor-lamp ...
3ddd
$1
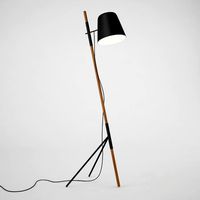
Floor lamp
...3ddd light , floor lamp , floor , boconcept http://www.boconcept.com/en-us/accessories/lamps/lamps/floor-lamps/9583/7742/outriggerfloor-lamp ...
3d_export
$120

gas carrier at the berth
...with gas carrier, loading arms and an overpass. the outrigger part of the berth. gas carrier of icebreaking type....
3d_export
$263

Seaport
...structures, fire-fighting facilities and reservoirs), and the root and outrigger part of the berth with an ice-type gas carrier,...
3d_export
$175
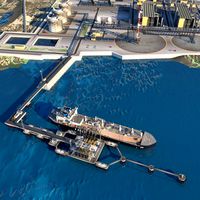
sea port
...sea port 3dexport sea port with gas carrier, mooring outrigger coastal zone, lng plant and oil terminal. port infrastructure....
free3d
free

Outrigger Canoe v1
...outrigger canoe v1
free3d
outrigger canoe v1 printable, low poly model.
Canoe
turbosquid
$39

Canoe
...yalty free 3d model canoe for download as obj, fbx, and blend on turbosquid: 3d models for games, architecture, videos. (1358809)
turbosquid
$37

Canoe
...
royalty free 3d model canoe for download as ma, obj, and fbx on turbosquid: 3d models for games, architecture, videos. (1226329)
turbosquid
$29

Canoe
... available on turbo squid, the world's leading provider of digital 3d models for visualization, films, television, and games.
turbosquid
$1

canoe
... available on turbo squid, the world's leading provider of digital 3d models for visualization, films, television, and games.
turbosquid
$1

canoe
... available on turbo squid, the world's leading provider of digital 3d models for visualization, films, television, and games.
3ddd
$1

Шляпа, Canoe
...dd
шляпа , canoe
шляпка с небольшими полями оформлена в лаконичном дизайне
polys: 42.272
turbosquid
$75

canoe 02
...urbosquid
royalty free 3d model canoe 02 for download as max on turbosquid: 3d models for games, architecture, videos. (1515828)
3d_export
$38
Canoe with paddles 3D Model
...ith paddles 3d model
3dexport
canoe boat kayak water ship paddle paddles canoes
canoe with paddles 3d model tartino 1928 3dexport
turbosquid
$9

Wood Canoe
...free 3d model wood canoe for download as ma, ma, fbx, and obj on turbosquid: 3d models for games, architecture, videos. (1634179)
3d_export
$44
Canoe 3D Model
...dexport
canoe boat sport water sue spray woodworker sea river recreation hobby kayak paddle
canoe 3d model yacek78 28304 3dexport
Pvc
turbosquid
$39
pvc window
...bosquid
royalty free 3d model pvc window for download as max on turbosquid: 3d models for games, architecture, videos. (1205578)
turbosquid
$19

window PVC
...bosquid
royalty free 3d model window pvc for download as 3ds on turbosquid: 3d models for games, architecture, videos. (1204830)
turbosquid
$15
PVC Band
...turbosquid
royalty free 3d model pvc band for download as ma on turbosquid: 3d models for games, architecture, videos. (1287079)
turbosquid
$3
Pvc taping
...bosquid
royalty free 3d model pvc taping for download as max on turbosquid: 3d models for games, architecture, videos. (1161550)
turbosquid
$1

PVC Fittings
... available on turbo squid, the world's leading provider of digital 3d models for visualization, films, television, and games.
turbosquid
$1

PVC elbow
... available on turbo squid, the world's leading provider of digital 3d models for visualization, films, television, and games.
turbosquid
free

PvC Window
... available on turbo squid, the world's leading provider of digital 3d models for visualization, films, television, and games.
turbosquid
$29

Pvc cabinet
... pvc cabinet for download as blend, dae, fbx, obj, stl, and x on turbosquid: 3d models for games, architecture, videos. (1669537)
turbosquid
$10

PVC PIPE FITTING
...d
royalty free 3d model pvc pipe fitting for download as skp on turbosquid: 3d models for games, architecture, videos. (1164250)
turbosquid
$17
Glass PVC Table
...ee 3d model glass pvc table for download as max, obj, and fbx on turbosquid: 3d models for games, architecture, videos. (1267063)
Kit
turbosquid
$3

Bathroom Kit Baño kit
... available on turbo squid, the world's leading provider of digital 3d models for visualization, films, television, and games.
turbosquid
$19

Kit
... available on turbo squid, the world's leading provider of digital 3d models for visualization, films, television, and games.
3d_export
$20

Drift Kit
...drift kit
3dexport
turbosquid
$40

BitCoin Kit
...urbosquid
royalty free 3d model bitcoin kit for download as on turbosquid: 3d models for games, architecture, videos. (1519068)
turbosquid
$9

Industrial kit
...osquid
royalty free 3d model industrial kit for download as on turbosquid: 3d models for games, architecture, videos. (1144117)
turbosquid
$6

Kit Vases
...
turbosquid
royalty free 3d model kit vases for download as on turbosquid: 3d models for games, architecture, videos. (1285114)
turbosquid
free

Survival Kit
...rbosquid
royalty free 3d model survival kit for download as on turbosquid: 3d models for games, architecture, videos. (1637721)
turbosquid
$50

Ninja Kit
...rbosquid
royalty free 3d model ninja kit for download as fbx on turbosquid: 3d models for games, architecture, videos. (1672364)
turbosquid
$35

Brushes Kit
...osquid
royalty free 3d model brushes kit for download as max on turbosquid: 3d models for games, architecture, videos. (1216721)
turbosquid
$19
Kit Bedroom
...osquid
royalty free 3d model kit bedroom for download as max on turbosquid: 3d models for games, architecture, videos. (1290049)
Tube
archibase_planet
free

Tube
...tube
archibase planet
paint tube stationery
tube - 3d model (*.gsm+*.3ds) for interior 3d visualization.
turbosquid
free
tube
...tube
turbosquid
free 3d model tube for download as c4d on turbosquid: 3d models for games, architecture, videos. (1378271)
archibase_planet
free
Tube
...tube
archibase planet
mascara cosmetics make-up
tube 1 - 3d model (*.gsm+*.3ds) for interior 3d visualization.
3d_export
$5
Tube pants
...tube pants
3dexport
tube pants
3d_export
free
Tube
...tube
3dexport
turbosquid
free
TUBE
...
free 3d model tube for download as blend, dae, fbx, and obj on turbosquid: 3d models for games, architecture, videos. (1672199)
turbosquid
$29

tube
...lty free 3d model tube for download as 3ds, obj, c4d, and fbx on turbosquid: 3d models for games, architecture, videos. (1442047)
3ddd
$1
perfume tube
...perfume tube
3ddd
тюбик
perfume tube, тюбик
3ddd
$1
Olivieri Tube
...olivieri tube
3ddd
olivieri
кровать olivieri tube
turbosquid
$22

Tube
... available on turbo squid, the world's leading provider of digital 3d models for visualization, films, television, and games.
4
turbosquid
$9

Office Chair 4-4
... available on turbo squid, the world's leading provider of digital 3d models for visualization, films, television, and games.
3d_export
$5

doors- 4
...doors- 4
3dexport
doors 4
3d_export
$5

hinge 4
...hinge 4
3dexport
hinge 4
3ddd
$1

Штора №4
...штора №4
3ddd
штора №4
3d_export
free

playstation 4
...playstation 4
3dexport
playstation 4
turbosquid
$1

re 4-4 electric locomotive
... free 3d model re 4 4 electric locomotive for download as obj on turbosquid: 3d models for games, architecture, videos. (1707845)
3ddd
$1

nexus 4
...nexus 4
3ddd
lg , телефон
nexus 4
3ddd
$1

4 Poufs
...4 poufs
3ddd
пуф
4 soft poufs
turbosquid
$12

Calligraphic Digit 4 Number 4
...hic digit 4 number 4 for download as max, obj, fbx, and blend on turbosquid: 3d models for games, architecture, videos. (1389332)
3ddd
$1

Dauphin 4+
...dauphin 4+
3ddd
кресло
dauphin 4+ конференц кресло