Thingiverse

3in1 Color Wheel with 61 Different Colors in single print by gallaghersart
by Thingiverse
Last crawled date: 3 years, 2 months ago
**Updated and more advanced prints with mixers can be found here https://www.thingiverse.com/thing:3657366
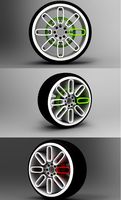
3in1 Color Wheel with 61 Different Colors in single print
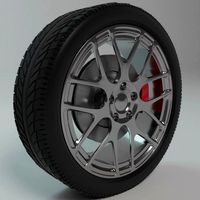
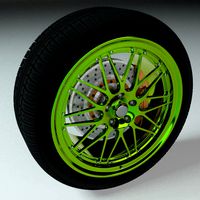
I created this so I can see the difference in mixing 3 filaments and also from different brands of filaments and colors.
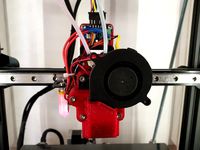
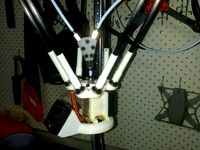
Current pictures are E0 Yellow, E1 Blue , and E2 Red
Normally I always use Hatchbox ABS, but I gave up waiting for Yellow to return to stock, so I could buy some. I went with Inland from Microcenter on Amazon. So far woks just as good and cheaper. I prefer hatchbox’s colors though.
You do not have to only use primary colors, you can use any you like or have then see how they blend together.
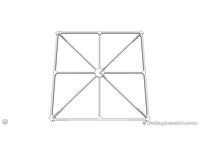
I have 61 hexagon’s placed together to form a circle like. I also have an extra E0 hexagon as a placement holder to you can easily find ones you may want change.
I included the Sketchup source and all 62 hexagons STL’s. But personally, I would just modify GCODE to work with your unit.
I used Cura setup up with 8 extruders and placed all files with E0 and merged, then ungrouped. Then 7 at a time I changed them from E0 to E1-E7. Then using an editor found those E1-E7 (T1 – T7) and copied over to new file.
Then renumbered them as I was adding them to new GCODE file. The “T1, T2, …) are commentated out so you can easily find them.
The Sketchup model has each component individually named witch Extruder it is once printed.
If you make your own just keep the order of Extuders to match layout and print order.
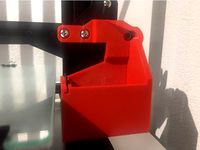
Warning! I use a purge bucket located at -10X and -20Y, on a 300mmx 300mm bed. See Picture way more filament is purged than used. This is a Color Test so all Colors received higher than normal max for a color purge. Normally for my Zonestar Z9M3 I have a purge of E90 or switching back to white, and as low as E50 for switching to a dark color. For the Color test all switches are E110.
I hope to improve this down the road.
Ejoy!
`mike
How to modify GCODE
I use marlin, so I can not say how this works on others while using just the supplied GCODE.
Find a hexagon you want to change the color to. Now in an editor find the group of code that reatlers to that hexagon (Example find T31 on COLOR_07_Print_order.jpg now in an editor find ;T31
The first small group is the purge and color change area for the following block of code.
So,
M163 S0 P16
M163 S1 P16
M163 S2 P68
Means 16% on E0 16% on E1 and 68% on E2
Along as they all ad up to 100, and if they’re zero then a “0” must be in place, just removing the line does not change the flow from last time M163 commands ran for each extruder.
If a purge bucket at -10Y and -20Y does not work for you then you will have to change these lines to go to a good location for EACH (61) times the purge is used
G0 X-10 F9000
G0 Y-20 F9000
If you want to change amount purged, then this is the line (Change the Exxx)
G1 E110 F400
If you want to get ride of the purge ( I many try to see how it looks, filament change will be while printing)
G10 S1
G0 X-10 F9000
G0 Y-20 F9000
G11 S1
G1 E110 F400
G92 E0
G1 F300 Z0.3
And 2nd line in main group of code
G1 F300 Z2.1
Other settings I use. 8.5 for retraction
That’s probably all you could easy change by editing GCODE, any more just start from scratch.
3in1 Color Wheel with 61 Different Colors in single print
I created this so I can see the difference in mixing 3 filaments and also from different brands of filaments and colors.
Current pictures are E0 Yellow, E1 Blue , and E2 Red
Normally I always use Hatchbox ABS, but I gave up waiting for Yellow to return to stock, so I could buy some. I went with Inland from Microcenter on Amazon. So far woks just as good and cheaper. I prefer hatchbox’s colors though.
You do not have to only use primary colors, you can use any you like or have then see how they blend together.
I have 61 hexagon’s placed together to form a circle like. I also have an extra E0 hexagon as a placement holder to you can easily find ones you may want change.
I included the Sketchup source and all 62 hexagons STL’s. But personally, I would just modify GCODE to work with your unit.
I used Cura setup up with 8 extruders and placed all files with E0 and merged, then ungrouped. Then 7 at a time I changed them from E0 to E1-E7. Then using an editor found those E1-E7 (T1 – T7) and copied over to new file.
Then renumbered them as I was adding them to new GCODE file. The “T1, T2, …) are commentated out so you can easily find them.
The Sketchup model has each component individually named witch Extruder it is once printed.
If you make your own just keep the order of Extuders to match layout and print order.
Warning! I use a purge bucket located at -10X and -20Y, on a 300mmx 300mm bed. See Picture way more filament is purged than used. This is a Color Test so all Colors received higher than normal max for a color purge. Normally for my Zonestar Z9M3 I have a purge of E90 or switching back to white, and as low as E50 for switching to a dark color. For the Color test all switches are E110.
I hope to improve this down the road.
Ejoy!
`mike
How to modify GCODE
I use marlin, so I can not say how this works on others while using just the supplied GCODE.
Find a hexagon you want to change the color to. Now in an editor find the group of code that reatlers to that hexagon (Example find T31 on COLOR_07_Print_order.jpg now in an editor find ;T31
The first small group is the purge and color change area for the following block of code.
So,
M163 S0 P16
M163 S1 P16
M163 S2 P68
Means 16% on E0 16% on E1 and 68% on E2
Along as they all ad up to 100, and if they’re zero then a “0” must be in place, just removing the line does not change the flow from last time M163 commands ran for each extruder.
If a purge bucket at -10Y and -20Y does not work for you then you will have to change these lines to go to a good location for EACH (61) times the purge is used
G0 X-10 F9000
G0 Y-20 F9000
If you want to change amount purged, then this is the line (Change the Exxx)
G1 E110 F400
If you want to get ride of the purge ( I many try to see how it looks, filament change will be while printing)
G10 S1
G0 X-10 F9000
G0 Y-20 F9000
G11 S1
G1 E110 F400
G92 E0
G1 F300 Z0.3
And 2nd line in main group of code
G1 F300 Z2.1
Other settings I use. 8.5 for retraction
That’s probably all you could easy change by editing GCODE, any more just start from scratch.
Similar models
thingiverse
free

Ender 3 v2 nozzle cleaning brush by Amoulier
...ure you home all axis before running this code or the printer can go pass the limit and slam the nozzle carrier to the far right!
thingiverse
free
A20M A10M BigMac MKII 5015 Blower
...
g1 e70 f3000
g92 e0
g1 e30 f200
g92 e0
g4 s3
g0 f10000
; end extruder 2
g92 e0
g1 e-5 f6000
g1 x-10.5 f8000
g1 e-70 f3000
g92 e0
thingiverse
free

Anet A8 Filament Scraper by DasEimer
... z0
g29 /autolevel
g1 z2 x-20 f9000
g1 y2 f9000
g92 e0
g1 e25 f500 /extrude 25mm
g4 s1
g1 x0 f2000 /wipe
g92 e0
g1 f9000
m117
thingiverse
free
CR-10 Mini Nozzle Purge with Microswiss Direct Drive by jefber
...raise the head slightly to adoid hitting glass on the way back
g90; switch back to absolute moves
m211 s1; turn on software stops
thingiverse
free
Geeetech A10t Purge Bucket with removable bucket by 123TaDa
...ipe
g0 x0 f2000 ; return
m211 s1 ; turn on soft stops once more
g1 e-0.5 ; try to prevent pips
g92 e0
; start extruder script end
thingiverse
free

T nut 20x20 aluminium extrusion - metal insertion Anet A8 by 22steve22
...d print
g1 e5.000000 f6000
g1 e-5.000000 f6000
g1 z3.800000 f300
g1 x105.750000 y106.100000 f9000
g1 e5.000000 f6000
g1 f9000
m82
thingiverse
free
Universal Nozzle brush Cleaner by NabCube
...g0 x290 y18 f7500;
g0 x260 y17 f7500;
g0 x290 y16 f7500;
g0 z20; end brush nozzle
g0 x150 y36 f7500
g28 z0
m117 cleaning finished
thingiverse
free
Filament mixer / dual extrusion / mixing extruder by techwit
...ge to snap off
g92 e0
---snip---
my setup is a e3d lite using a pair of these extruders http://www.thingiverse.com/thing:1708020
thingiverse
free

Wanhao Nozzle Wiper by skynet3d
...0; wait
;***tool change script end
i printed it in black pla and just used some leftover pieces of 1mm rubber i had lying around.
thingiverse
free
Ender 3 HotEnd Brush (remix) by ShaneAPowell
...y0 z7
g0 x90 y0 z7
; end final pre brush sequence
g0 x115 y115 f8000
see it in actionhttps://www.youtube.com/watch?v=ukf7wno6ka8
Gallaghersart
thingiverse
free
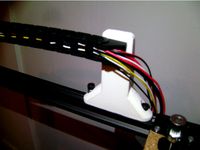
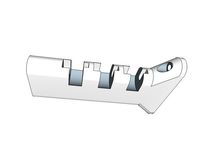
20xx Cable Chain riser by gallaghersart
...ame nuts.
i made this to allow for more room on my modified z9m3 corexy larger belts and custom rear belt alignment.
enjoy!
`mike
thingiverse
free
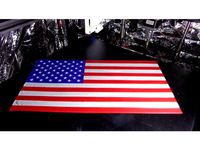
US Flag by gallaghersart
...ded also
they are designed to be printer with .4mm nozzle with a .3mm first layer height, remaining layers are .2mm layer height.
thingiverse
free
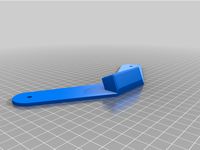
20xx Filament spool handles by gallaghersart
...ent spins easily, wish i did sooner. i’m also using clips to hold different size spools on support.
3x wheels
3x m5 15mm
1x clip
thingiverse
free
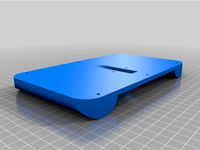
Duet 7i Handheld housing and mount by gallaghersart
...s for the handheld.
parts
• m3 tap/ bottom tap
• 8x m3 heat insets (holes are 5mm)
• 6x m3 bolt
• 2x m3 bolt
enjoy!
`mike
thingiverse
free

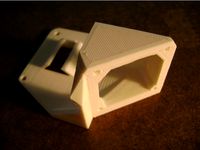
Duet 7i Screen Handheld housing and mount by gallaghersart
...s for the handheld.
parts
• m3 tap/ bottom tap
• 8x m3 heat insets (holes are 5mm)
• 6x m3 bolt
• 2x m3 bolt
enjoy!
`mike
thingiverse
free
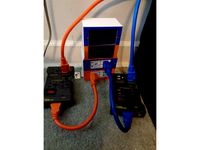
Dual circuit 4 gang box cover with meters by gallaghersart
...r if smoke alarm is set off.
parts
• 2x gfi
• 2x meters
• 1x 4x gang box metal with metal brackets on “bottom”
enjoy!
`mike
thingiverse
free
Z9M3 2nd Filament Hotend Fan by gallaghersart
... my part fan over to the other side and set it up as a second filament cooler fan.
i left room for auto level module
enjoy!
`mike
thingiverse
free

Refrigerator wall spacers to keep food from freezing by gallaghersart
...s later they are still holding. and freezing food has ended, and a more stable constant temperature can be achieved.
enjoy!
`mike
thingiverse
free
Marlin CoreXY skew test 200mm x 200mm remix by gallaghersart
...re precise areas to measure.
no type markings to speed up prints, just one coroner is different. this should be “a”.
enjoy!
`mike
thingiverse
free
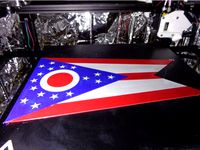
Flag of U.S. State of Ohio by gallaghersart
...he wall count no less than 2 (.8mm) so that the 1.2mm borders on 2nd layer end up being only parameters and no fill.
enjoy!
`mike
3In1
turbosquid
$6
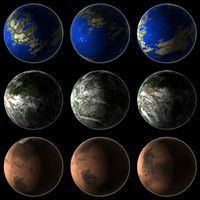
3In1 Planets
... available on turbo squid, the world's leading provider of digital 3d models for visualization, films, television, and games.
turbosquid
$12
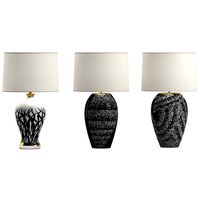
Lamp 162 3in1
...del lamp 162 3in1 for download as max, max, 3ds, fbx, and obj on turbosquid: 3d models for games, architecture, videos. (1648830)
turbosquid
$5
Mushroom pack (3in1)
... available on turbo squid, the world's leading provider of digital 3d models for visualization, films, television, and games.
turbosquid
$35

Ridgid hammer kit(3in1)
... 3d model ridgid hammer kit(3in1) for download as max and fbx on turbosquid: 3d models for games, architecture, videos. (1178680)
3d_export
$10
Set Pasta 3in1 3D Model
...set pasta 3in1 3d model
3dexport
pasta glass kitchen food decor
set pasta 3in1 3d model raman 98991 3dexport
3d_export
$10

Bouquet Tulips 3in1 3D Model
...bouquet tulips 3in1 3d model
3dexport
tulips tulipa bouquet vase flowers decor
bouquet tulips 3in1 3d model raman 98898 3dexport
3d_export
$10

Bouquet Roses 3in1 3D Model
...bouquet roses 3in1 3d model
3dexport
bouquet roses rose vase glass flowers decor
bouquet roses 3in1 3d model raman 98988 3dexport
turbosquid
$14

Chopping Board Set Totally Bamboo 3in1
...ard set totally bamboo 3in1 for download as max, fbx, and obj on turbosquid: 3d models for games, architecture, videos. (1637204)
3d_ocean
$6

HD Abstract Water Paint Liquid Splash 3in1
...rest in this models. 3d splashes models are high detailed, can be used by designers in advertisement etc. it’s simulated in re...
3d_ocean
$5
Wood CG Textures High Resulution 3in1 vol.2
...es diffuse map, specular map, diffuse map. high quality 3 seamless tileable wood texture, vol.2. sides is 2048x2048. pack incl...
61
3ddd
$1
Pillows 61
...pillows 61
3ddd
подушка
pillows 61. i hope you like it.thank you!
turbosquid
$6

Bedcloth 61
...osquid
royalty free 3d model bedcloth 61 for download as max on turbosquid: 3d models for games, architecture, videos. (1522727)
turbosquid
$16

Chair 61
...alty free 3d model chair 61 for download as max, obj, and fbx on turbosquid: 3d models for games, architecture, videos. (1497579)
turbosquid
$15

Curtain 61
...ty free 3d model curtain 61 for download as max, obj, and fbx on turbosquid: 3d models for games, architecture, videos. (1414182)
turbosquid
$6

Table 61
...alty free 3d model table 61 for download as max, obj, and fbx on turbosquid: 3d models for games, architecture, videos. (1503886)
turbosquid
$20

Bath 61
... free 3d model bath 61 for download as max, dxf, fbx, and dwg on turbosquid: 3d models for games, architecture, videos. (1277093)
turbosquid
$12

Sofa 61
... free 3d model sofa 61 for download as max, max, fbx, and obj on turbosquid: 3d models for games, architecture, videos. (1578762)
3ddd
$1

Декор 61
...декор 61
3ddd
изготавливалось под заказ
turbosquid
$29

house 61
... available on turbo squid, the world's leading provider of digital 3d models for visualization, films, television, and games.
turbosquid
$29

Landscape 61
... available on turbo squid, the world's leading provider of digital 3d models for visualization, films, television, and games.
Single
3d_export
$5
single sofa single chair
...single sofa single chair
3dexport
single sofa single chair 3d model
3d_export
$5

single sofa single chair
...single sofa single chair
3dexport
single sofa single chair 3d model
3d_export
$5

single fastener
...single fastener
3dexport
single fastener
3ddd
$1
Single FLOU
... sofa , трансформер
диван-трансформер single от итальянского производителя flou
3ddd
$1
bed single
...bed single
3ddd
постельное белье
bed single 190cm*90cm
3ddd
$1
Single Flou
...single flou
3ddd
качественная моделька дивана-трансформера single flou.
3d_ocean
$9
Single sofa
...le sofa
3docean
modern sofa single sofa sofa white sofa.comfortable sofa
single sofa,sofa,modern sofa,white sofa.comfortable sofa
3d_export
free
Single Knife
...single knife
3dexport
a single knife, presumably it was used as one of the throwing knives.
3d_export
free

couch - single
...couch - single
3dexport
low poly single couch with .psd file for personal customization
3d_ocean
$5
Single Sofa
...single sofa
3docean
single sofa made by fabric , wood frame & ss leg
Wheel
archibase_planet
free
Wheel
...l steering control steering wheel
wheel ship steering wheel n060215 - 3d model (*.gsm+*.3ds+*.max) for exterior 3d visualization.
3d_ocean
$14
Wheel
...wheel
3docean
car rim car wheel rim wheel
high poly car wheel design. 16,840 polys
3d_export
free
wheel
...wheel
3dexport
wheel
3d_export
free
wheel
...wheel
3dexport
wheel
3d_export
free
Wheel
...wheel
3dexport
wheel
3d_export
$5

wheel
...wheel
3dexport
wheel for car.
3d_export
$5
wheel
...wheel
3dexport
car wheel
3d_export
$5
wheel
...wheel
3dexport
car wheel
3d_export
$5
wheel
...wheel
3dexport
car wheel
3d_export
$5
wheel
...wheel
3dexport
car wheel
Different
turbosquid
free
Different Chair
...id
free 3d model different chair for download as max and fbx on turbosquid: 3d models for games, architecture, videos. (1642013)
turbosquid
free

different rubbish
... available on turbo squid, the world's leading provider of digital 3d models for visualization, films, television, and games.
3d_export
$10

Different 3D Model
...different 3d model
3dexport
different 3d model wintik174 96497 3dexport
3d_export
free
three different type
...three different type
3dexport
three different type: mace, axe, sword
3d_ocean
$10
Different types of gears
... industrial parts machine gears machine parts mechanics parts round shape
different types of machine parts/gears made in blender.
turbosquid
free

Wires in different colours
...ires in different colours for download as blend, fbx, and obj on turbosquid: 3d models for games, architecture, videos. (1652797)
turbosquid
$6
3 Different Arrows
...3d model 3 different arrows for download as 3ds, obj, and fbx on turbosquid: 3d models for games, architecture, videos. (1478401)
turbosquid
$4

Four Different Vases
...odel four different vases for download as obj, fbx, and blend on turbosquid: 3d models for games, architecture, videos. (1484813)
3d_ocean
$3

8 Different Stone
...ures : low poly mesh & hand painting texture ~contain normal map ~different mesh have any problem? feel free to contact me...
turbosquid
$45

Different Food Products
... food products for download as blend, max, fbx, gltf, and obj on turbosquid: 3d models for games, architecture, videos. (1614198)
Colors
design_connected
$11
Colors
...colors
designconnected
zanotta colors lounge chairs computer generated 3d model. designed by ilkka suppanen.
3ddd
$1
pillows colors
...pillows colors
3ddd
pillows colors , подушка
pillows colors
3ddd
free
color dress
...3ddd
color dress , манекен , одежда
color dress
3ddd
$1
светильники Colors
... massive , бельгия
светильники massive серия colors, очень веселые
3d_export
$30

color chameleon
...color chameleon
3dexport
color chameleon
3ddd
$1
color vase
...color vase
3ddd
color vase
3d_ocean
$2
color pen
...3d model of color pen. model is based on edge loop topology. all materials are included. model is render ready and ready for use.
3ddd
$1
Color Parquet
...color parquet
3ddd
паркет
color parquet
3ddd
free
color console
...color console
3ddd
консоль
color console
3d_export
$5
Technum Color
...technum color
3dexport
technum color led от imperiumloft https://imperiumloft.ru/dizajn-loft/technum-color-led.html
Color
design_connected
$11
Colors
...colors
designconnected
zanotta colors lounge chairs computer generated 3d model. designed by ilkka suppanen.
3ddd
$1
pillows colors
...pillows colors
3ddd
pillows colors , подушка
pillows colors
3ddd
free
color dress
...3ddd
color dress , манекен , одежда
color dress
3ddd
$1
светильники Colors
... massive , бельгия
светильники massive серия colors, очень веселые
3d_export
$30
color chameleon
...color chameleon
3dexport
color chameleon
3ddd
$1
color vase
...color vase
3ddd
color vase
3d_ocean
$2
color pen
...3d model of color pen. model is based on edge loop topology. all materials are included. model is render ready and ready for use.
3ddd
$1
Color Parquet
...color parquet
3ddd
паркет
color parquet
3ddd
free
color console
...color console
3ddd
консоль
color console
3d_export
$5
Technum Color
...technum color
3dexport
technum color led от imperiumloft https://imperiumloft.ru/dizajn-loft/technum-color-led.html
design_connected
$27

...print
designconnected
moroso print computer generated 3d model. designed by wanders, marcel.
3ddd
free

Eichholtz Prints
...- eichholtz print central station i
13 - eichholtz print central station ii
14 - eichholtz print marisa
15 - eichholtz print tish
3ddd
$1

Eichholtz Prints
...print abstract - set of 2
10 - eichholtz print orange abstract
11 - eichholtz print buddha right
12 - eichholtz print buddha left
turbosquid
$1

... available on turbo squid, the world's leading provider of digital 3d models for visualization, films, television, and games.
3ddd
free

Eichholtz Prints
...of 4
2 - print dunbar 2 set of 4
3 - print guadeloupe 1 set of 4
4 - print guadeloupe 2 set of 4
5 - print giles
6 - print trett
3ddd
$1

Eichholtz Prints
...nt tutti frutti
3 - eichholtz prints watson - set of 2
4 - eichholtz prints antique nautilus - set of 2
5 - eichholtz print tiara
3d_export
$5

Monster for printing
...monster for printing
3dexport
monster 3d model printing
3ddd
free

printed rug
...printed rug
3ddd
ковер
very creative printed rug
3ddd
free

Eichholtz Prints
...иал: бумага
габариты (вхш): 72 x 62 см
описание: print sweetmeat - постер в деревянной раме.
3 - prints varsity set of 2
арти
3ddd
free

Art Print Posters
...art print posters
3ddd
прованс
art print posters by patrician prints