Thingiverse

3DPInfo - 3D Printer and filament INFO Display by gna13495
by Thingiverse
Last crawled date: 3 years ago
-- ENGLISH
First of all, I made this to learn Arduino, there is another ways to have the same results for your printer.
3DPInfo - A display made to keep you up with your printer status, showing informations about your filament.
Description on images.
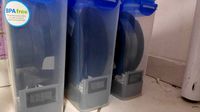
The Arduino circuit picture is missing one temperature sensor, just replicate the scheme, I installed the other sensor inside my filament dry box.
SD card reader and temperature sensor doesn't need the resistor.
To control screen brightness use a 10k potentiometer on the black jumper that is on the right side of the screen.
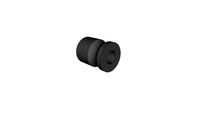
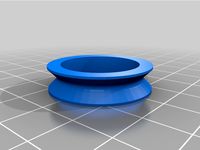
Different types of buttons and Knobs.
Make sure when changing filament to turn off the device.
Made for Ender 3 PRO, if porting to another printer make sure to change the "circmed" var to the circumference size of your extruder gear divided by the number of steps of your encoder.
The grams measure are set to PLA, if using another material please consider adjust the var "weight".
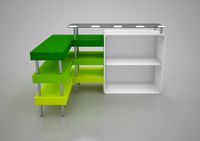
The file RAIL_TST_V3 is the bottom support that fits on the rails of Ender 3 Pro, make sure to adapt it to your printer if it is not a Ender 3 PRO, as well as, ADAP_TST_v1 (adapter to hold encoder on extruder motor) and ADAP_KNOB (adapter to connect encoder on extruder gear).
Note: I'm just a maker, feel free to improve my Arduino code and/or the 3D models.
ARDUINO PROJECT HUB POST COMING SOON
-- PORTUGUÊS - PTBR
Em primeiro lugar, fiz isso para aprender Arduino, há outras maneiras de obter os mesmos resultados para sua impressora.
3DPInfo - Um display feito para mantê-lo informado sobre o estado de sua impressora, mostrando informações sobre o seu filamento.
Descrição nas imagens.
Na foto do circuito do Arduino está sem um sensor de temperatura, basta replicar o esquema, instalei o outro sensor dentro da minha caixa seca de filamento.
O leitor de cartão SD e o sensor de temperatura não precisam do resistor.
Para controlar o brilho da tela, use um potenciômetro de 10k no jumper preto do lado direito da tela.
Diferentes tipos de botões e knobs.
Certifique-se de que, ao trocar o filamento, o dispositivo está desligado.
Feito para Ender 3 PRO, se for portar para outra impressora, certifique-se de alterar a variável "circmed" para o tamanho da circunferência da engrenagem da extrusora dividido pelo número de etapas do seu encoder.
A medida em gramas está definida para PLA, se estiver usando outro material, considere ajustar a var "weight".
O arquivo RAIL_TST_V3 é o suporte inferior que encaixa nos trilhos da Ender 3 Pro, adapte para sua impressora se o seu modelo não for a Ender 3 PRO, assim como ADAP_TST_v1 (adaptador para segurar o encoder no motor da extrusora) e ADAP_KNOB (adaptador para conectar o encoder na engrenagem da extrusora).
Obs: Eu sou somente um maker, fique a vontade para melhorar meu código do Arduino e/ou os modelos 3D.
POST NO ARDUINO PROJECT HUB EM BREVE
First of all, I made this to learn Arduino, there is another ways to have the same results for your printer.
3DPInfo - A display made to keep you up with your printer status, showing informations about your filament.
Description on images.
The Arduino circuit picture is missing one temperature sensor, just replicate the scheme, I installed the other sensor inside my filament dry box.
SD card reader and temperature sensor doesn't need the resistor.
To control screen brightness use a 10k potentiometer on the black jumper that is on the right side of the screen.
Different types of buttons and Knobs.
Make sure when changing filament to turn off the device.
Made for Ender 3 PRO, if porting to another printer make sure to change the "circmed" var to the circumference size of your extruder gear divided by the number of steps of your encoder.
The grams measure are set to PLA, if using another material please consider adjust the var "weight".
The file RAIL_TST_V3 is the bottom support that fits on the rails of Ender 3 Pro, make sure to adapt it to your printer if it is not a Ender 3 PRO, as well as, ADAP_TST_v1 (adapter to hold encoder on extruder motor) and ADAP_KNOB (adapter to connect encoder on extruder gear).
Note: I'm just a maker, feel free to improve my Arduino code and/or the 3D models.
ARDUINO PROJECT HUB POST COMING SOON
-- PORTUGUÊS - PTBR
Em primeiro lugar, fiz isso para aprender Arduino, há outras maneiras de obter os mesmos resultados para sua impressora.
3DPInfo - Um display feito para mantê-lo informado sobre o estado de sua impressora, mostrando informações sobre o seu filamento.
Descrição nas imagens.
Na foto do circuito do Arduino está sem um sensor de temperatura, basta replicar o esquema, instalei o outro sensor dentro da minha caixa seca de filamento.
O leitor de cartão SD e o sensor de temperatura não precisam do resistor.
Para controlar o brilho da tela, use um potenciômetro de 10k no jumper preto do lado direito da tela.
Diferentes tipos de botões e knobs.
Certifique-se de que, ao trocar o filamento, o dispositivo está desligado.
Feito para Ender 3 PRO, se for portar para outra impressora, certifique-se de alterar a variável "circmed" para o tamanho da circunferência da engrenagem da extrusora dividido pelo número de etapas do seu encoder.
A medida em gramas está definida para PLA, se estiver usando outro material, considere ajustar a var "weight".
O arquivo RAIL_TST_V3 é o suporte inferior que encaixa nos trilhos da Ender 3 Pro, adapte para sua impressora se o seu modelo não for a Ender 3 PRO, assim como ADAP_TST_v1 (adaptador para segurar o encoder no motor da extrusora) e ADAP_KNOB (adaptador para conectar o encoder na engrenagem da extrusora).
Obs: Eu sou somente um maker, fique a vontade para melhorar meu código do Arduino e/ou os modelos 3D.
POST NO ARDUINO PROJECT HUB EM BREVE
Similar models
3dwarehouse
free
Engrenagem MK8 extrusora; gear extruder 3d printer
...extrusora; gear extruder 3d printer
3dwarehouse
engrenagem mk8 para extrusora de impressora 3d que utiliza filamento de 1,75mm .
thingiverse
free

Suporte Sensor Filamento Tronxy XY-2 PRO Titan Extruder by marcelocaarapo
...essora 3d tronxy xy-2 pro quando usa a extrusora titan. com alinhamento perfeito do filamento para evitar o desgaste da extrusora
thingiverse
free

Guia de Filamento Ender 3 by thiago_japa
... da extrusora de plástico original da ender 3 que substituí na minha impressora, além de um parafuso m4 com duas arruelas e porca
thingiverse
free

Suporte Mangueira eBOX para Ender 3 by CONCRETIZE
...s desagradáveis na extrusora.
você aproveita os parafusos da bucha do fuso "z" para realizar a fixação desse suporte.
grabcad
free

Extrusora
...extrusora
grabcad
extrusora de filamentos para impressora 3d.
thingiverse
free

Suporte alinhamento filamento ender 3 pro by jcsmaia
...giverse
suporte para alinhar a entrada do filamento na extrusora.
não necessita de parafusos para fixacao.
melhor utilizar petg.
thingiverse
free
2x1 suporte guia filamento e base sensor fim filamento ender 3 by ricardobocchetti
...ia de filamento com rolamento 608 mais suporte para encaixe do switch da creality para adaptação como sensor de fim de filamento.
thingiverse
free

Filament guide - ENDER 3 (V2) by fr4nkbruno
... to place the filament roller on the bottom front of ender 3, these guides prevent the filament from touching the z axis spindle.
thingiverse
free

AutoLev-caixa box da placa Ender 3 v2 by LuisNarciso
... sensor autolev mas sem o orificio de entrada do cabo do end stop que na versão original fica visível pela frente da impressora .
grabcad
free

Creality CR-10 v2 Direct Drive adapter
...s. una con soporte para el sensor de falta de filamento y otra sin este sensor.
adjunto un modelo básico del sensor de filamento.
Gna13495
thingiverse
free

Regular Standard Average Phone Stand by gna13495
...there you go.
fit most smartphones, even larger ones.
there are two files, one regular and other 80% the size of the regular one.
thingiverse
free
Filament Dry Box Hermetic by gna13495
...se sua caixa seca tiver uma base pequena como a minha, use os pinos para segurar os rolamentos na mesma configuração que a minha.
thingiverse
free

Logitech Saitek X56 HOTAS Universal Desk Support/Suporte Mesa by gna13495
...ma densidade menor. eu recomendo que a impressão da junção l seja feita de modo que a peça esteja como um triângulo sobre a mesa.
Info
turbosquid
$7
info desk
... available on turbo squid, the world's leading provider of digital 3d models for visualization, films, television, and games.
3d_ocean
$3

Electronic Info Panel
...lygonal model, easy to animate. - poly count: 134 - formats: max /obj /fbx/3ds/dxf - high detail was preserved with 2048&#...
turbosquid
$7

Info desk 4
... available on turbo squid, the world's leading provider of digital 3d models for visualization, films, television, and games.
3d_export
$5
Vase white read info 3D Model
...vase white read info 3d model
3dexport
vase white
vase white read info 3d model wclf 90474 3dexport
cg_studio
$65

shanghai - pudong int info port3d model
...model
cgstudio
.3ds - shanghai - pudong int info port 3d model, royalty free license available, instant download after purchase.
evermotion
$5

154 eileen 44 sample info am80
...een & frank luxury-class modular shelf system designed for aandres by andy andresen.
www.aandres. evermotion 3d models shop.
3d_export
free

nose aspirator
...nose aspirator 3dexport more info and files...
3d_export
$5
sofa
...sofa 3dexport model info : edges : 389490 faces : 261016 groups :...
3ddd
$1
Studio Beam Rufus
...slims collection производитель studio beam модель rufus technical info info rufus dim: 29 x 39 cm material: metal powder...
3ddd
$1
Studio Beam Elmo
...slims collection производитель studio beam модель elmo technical info info elmo dim: 40 x 38 cm material: metal powder...
Display
3ddd
$1

Display
...display
3ddd
терминал
display computer 3d model
3d_export
$5
Display
...display
3dexport
display<br>verts 2.262<br>faces 3.928
3ddd
$1
Display cabinet
...display cabinet
3ddd
витрина
display cabinet
turbosquid
$50

display
... available on turbo squid, the world's leading provider of digital 3d models for visualization, films, television, and games.
turbosquid
$25

DISPLAY
... available on turbo squid, the world's leading provider of digital 3d models for visualization, films, television, and games.
turbosquid
$10
Display
...e 3d model display for download as ma, max, obj, fbx, and dae on turbosquid: 3d models for games, architecture, videos. (1387472)
3d_export
$6
display stand
...display stand
3dexport
super market display stand
3d_ocean
$12
Display Case
...rnishing furniture glass storage vetrinetta white
a 3d model of a display case. the texture for the back of the case is provided.
3d_export
$30

Vehicle display
...vehicle display
3dexport
vehicle display consists of podium and vehicle cover no vehicle there is a veiled vehicle silhouette
3ddd
$1
Jewellery Displays
...jewellery displays
3ddd
украшения
jewellery displays
ring stand bangle stand, necklace stand,
bracelet
Filament
3ddd
$1

Filament Cage
...filament cage
3ddd
лофт , filament cage
модель бра, делалась по фото!
turbosquid
$3

FILAMENT COUNTER
...d
royalty free 3d model filament counter for download as stl on turbosquid: 3d models for games, architecture, videos. (1563049)
3d_export
$5

Filament lamp 3D Model
...filament lamp 3d model
3dexport
filament lamp 3d model kevin 54161 3dexport
3d_export
$5

Filament led light bulb
...filament led light bulb
3dexport
realistic 3d model of filament light bulb with v-ray materials.
3d_export
$5

Filament led light bulb
...filament led light bulb
3dexport
realistic 3d model of filament light bulb with v-ray materials.
3d_export
$5

Filament led light bulb
...filament led light bulb
3dexport
realistic 3d model of filament light bulb with v-ray materials.
3d_export
$5

Filament led light bulb
...filament led light bulb
3dexport
realistic 3d model of filament light bulb with v-ray materials.
3d_export
$5

Filament led light bulb
...filament led light bulb
3dexport
realistic 3d model of filament light bulb with v-ray materials.
3d_export
$5

Filament bulb candle 3D Model
...filament bulb candle 3d model
3dexport
filament bulb-candle
filament bulb candle 3d model kevin 54163 3dexport
3ddd
$1

Factory filament metal shade
...factory filament metal shade
3ddd
restoration hardware
restoration hardware. 20th c. factory filament metal shade.
Printer
archibase_planet
free

Printer
...inter
archibase planet
printer laser printer pc equipment
printer n120614 - 3d model (*.gsm+*.3ds) for interior 3d visualization.
archibase_planet
free

Printer
...rchibase planet
laser printer office equipment computer equipment
printer - 3d model (*.gsm+*.3ds) for interior 3d visualization.
turbosquid
$100

Printer
...er
turbosquid
royalty free 3d model printer for download as on turbosquid: 3d models for games, architecture, videos. (1487819)
turbosquid
$7

Printer
...royalty free 3d model printer for download as ma, ma, and obj on turbosquid: 3d models for games, architecture, videos. (1644580)
turbosquid
$30

Printer
... available on turbo squid, the world's leading provider of digital 3d models for visualization, films, television, and games.
turbosquid
$20

Printer
... available on turbo squid, the world's leading provider of digital 3d models for visualization, films, television, and games.
turbosquid
$6

printer
... 3d model printer for download as 3ds, max, dxf, obj, and fbx on turbosquid: 3d models for games, architecture, videos. (1276861)
turbosquid
$4
Printer
... 3d model printer for download as 3ds, max, dxf, obj, and fbx on turbosquid: 3d models for games, architecture, videos. (1276856)
turbosquid
$2

Printer
... available on turbo squid, the world's leading provider of digital 3d models for visualization, films, television, and games.
archive3d
free
Printer 3D Model
...
archive3d
printer laser printer pc equipment
printer - 3d model for interior 3d visualization.