Thingiverse

3dhacker printer test by cymon
by Thingiverse
Last crawled date: 3 years, 1 month ago
If you like my work I hope you'll consider supporting me on Pateron: https://www.patreon.com/3DPrintingProfessor
Subscribe to me on YouTube: https://www.youtube.com/user/mrjoesays
See http://joesmakerbot.blogspot.com/2013/06/creating-test-print-object.html for more information
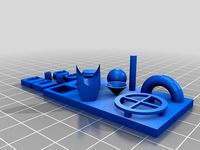
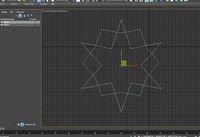
See the annotated picture for details:
A. The organic area just looks pretty and shows how well your printer can print details like this.
B. The arms of the 3 each extend at different angles to test overhang. The top one extends at 60 degrees which may be a challenge for some to print but a properly calibrated machine should be able to handle it. The middle is at 45 degrees, even a badly calibrated machine should be able to do this, the bottom is 70 degrees, bonus points for making that work but it is expected to fail.
C. The D tests arches. With an arch this big it is likely to fail, but it's a question of how far it gets before failing.
D. The H tests bridging.
E. Each letter in "3DHacker.com" is the minimum safe size for text and 0.1mm higher than the one next to it testing relief and raised printing detail. If printing any less than 0.1mm layer heights it is possible there will not be a difference between too letters. Gaps that develop around the sunken letter can be fixed by reducing the number of shells at the cost of... well, shells.
F. The 3 spikes behind the H should be as tall as the H, however this test is designed to fail. Instead it will show how fine the details can be before your slicer will stop putting them in.
G. The main body and secondary block are joined by a filament diameter tester. If your filament diameter is too low you will not be able to mate the two parts. If it's too high they won't stay mated.
H. When mated relief lettering on the bottom of the print will demonstrate how well this can work, and the trouble that shells can cause for this.
I. On the top side of the second half the top wall demonstrates vertical holes with triangles, squares, on to circle.
J. In the middle is a shape designed to demonstrate how thin, flat organic shapes can turn out sometimes when designed horizontally like the legs of an octopus or a tail. This part may not be fixable simply by dropping shells, it's just one of those quirks to be aware of.
K. The bottom wall is designed as a fail test where the wall is getting increasingly thinner until it's too thin to print, but at what point will your 3D printer stop printing.
It's a bit bigger than some tests but it covers a lot.
Subscribe to me on YouTube: https://www.youtube.com/user/mrjoesays
See http://joesmakerbot.blogspot.com/2013/06/creating-test-print-object.html for more information
See the annotated picture for details:
A. The organic area just looks pretty and shows how well your printer can print details like this.
B. The arms of the 3 each extend at different angles to test overhang. The top one extends at 60 degrees which may be a challenge for some to print but a properly calibrated machine should be able to handle it. The middle is at 45 degrees, even a badly calibrated machine should be able to do this, the bottom is 70 degrees, bonus points for making that work but it is expected to fail.
C. The D tests arches. With an arch this big it is likely to fail, but it's a question of how far it gets before failing.
D. The H tests bridging.
E. Each letter in "3DHacker.com" is the minimum safe size for text and 0.1mm higher than the one next to it testing relief and raised printing detail. If printing any less than 0.1mm layer heights it is possible there will not be a difference between too letters. Gaps that develop around the sunken letter can be fixed by reducing the number of shells at the cost of... well, shells.
F. The 3 spikes behind the H should be as tall as the H, however this test is designed to fail. Instead it will show how fine the details can be before your slicer will stop putting them in.
G. The main body and secondary block are joined by a filament diameter tester. If your filament diameter is too low you will not be able to mate the two parts. If it's too high they won't stay mated.
H. When mated relief lettering on the bottom of the print will demonstrate how well this can work, and the trouble that shells can cause for this.
I. On the top side of the second half the top wall demonstrates vertical holes with triangles, squares, on to circle.
J. In the middle is a shape designed to demonstrate how thin, flat organic shapes can turn out sometimes when designed horizontally like the legs of an octopus or a tail. This part may not be fixable simply by dropping shells, it's just one of those quirks to be aware of.
K. The bottom wall is designed as a fail test where the wall is getting increasingly thinner until it's too thin to print, but at what point will your 3D printer stop printing.
It's a bit bigger than some tests but it covers a lot.
Similar models
thingiverse
free

Test calibration by 3DMasteer
...se latter should be printing fine too. no need to print any rafts because this will also test the first layer print adhesion too.
thingiverse
free
Calibration Nightmare by BRUXXUS
...est that i made to test my printer's calibration in a few areas.
print without supports and see how your printer handles it!
thingiverse
free

Delta Printer Calibration Sphere by askalex
...re here, with x's y's and z'eds, and a l-shaped hole through to test how much cooler it would look with a hole in it.
thingiverse
free

One-Shelled Calibration Parts by blakefobrien
...yone calibrating their printer's extrusion multiplier. these parts should print with one shell. they are 20x20x10 mm in size.
thingiverse
free
Overkill torture test by PKSForDays
...hingiverse
test your printer capabilities with this torture test. a calibration cube is also there to check how well it prints.
thingiverse
free

Tower, small pillar calibration by Sashir
...st how well my printer can print small pillars, the smallest ones on top are 0.5mm, and it may be hard for slicer to detect them.
thingiverse
free

YES Keyring for printing at home! by 3DPrintersforYES
... the prices and quality compare. sorry about the half-printed pics. the first one's not off the printer yet! more here later.
thingiverse
free
Simple bridge test by vomestein
...suring the pilars with base. if printed well, there should be a nice ok visible at the top. tested on abs with cooling. have fun!
thingiverse
free

Overhang Calibration Pieces - 30, 35, 40, 45 degree by chickan
... handles overhangs of various difficulties. 30 degree being difficult for most printers, 45 degree being easy for most printers.
thingiverse
free

Calibration Test by anthonyschwartz7
...6mm circle and a 16mm square cut out in the base and there are fillets which are 45° and chamfer which are 2 mm all over the part
3Dhacker
thingiverse
free

3D Printed Universal Phone Cradle - Integrated Wireless Charger by macdaddy
...of 11mm or smaller. leave a comment on the 3dhacker posting if you want a copy of the model...
thingiverse
free
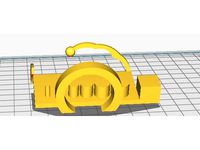
Cymon's Designs self-serving test print by cymon
...from above its a logo. also available on 3dhacker: http://3dhackercom/category/559/test-prints/listings/575/cymons-designs-3d-print-test.html ...
Cymon
thingiverse
free

Cymon Fully Posable Robot Toy by cymon
...ing me on pateron: https://www.patreon.com/3dprintingprofessor
subscribe to me on youtube: https://www.youtube.com/user/mrjoesays
thingiverse
free

Transistor Minimug by cymon
...verse
edited the minimug for the transistor, a local makerspace in provo utah in honor of their prusa. http://thetransistor.com/
thingiverse
free

Slanted stacking bins by cymon
...tacking bins by cymon
thingiverse
the floor of these bins are are slanted towards the front. half sized bins are also available.
thingiverse
free
Cymon's Designs self-serving test print by cymon
...a logo.
also available on 3dhacker: http://3dhacker.com/category/559/test-prints/listings/575/cymons-designs-3d-print-test.html
thingiverse
free

iApple by cymon
...any trouble to extract it from the blender file. wasn't much trouble to make in the first place. so do what you want with it.
thingiverse
free
K-9 mini with ring BY Cymon by iSuat
...k-9 mini with ring by cymon by isuat
thingiverse
the original design http://www.thingiverse.com/thing:29700
thingiverse
free

Cute Cthulhu Walker by cymon
... want your little cthulhu to be more destructive, now you can wind it up and watch it adorably crush everything in it's path.
thingiverse
free
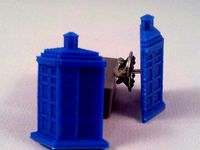
TARDIS pin by cymon
...rintingprofessor
subscribe to me on youtube: https://www.youtube.com/user/mrjoesays
every whovian's most versatile accessory.
thingiverse
free
Elegant Ring-a-thing by cymon
...it stuck out so far that anything you put on it became too unwieldy for regular use.
neverfear, the elegant ring-a-thing is here!
thingiverse
free
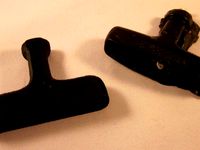
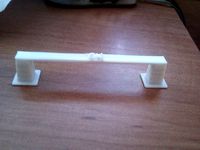
Replacement Pull Handle by cymon
...nt on many small gas engines.
print in abs, 100% infill, and smooth with acetone vapor to assure surface strength before using.
Printer
archibase_planet
free

Printer
...inter
archibase planet
printer laser printer pc equipment
printer n120614 - 3d model (*.gsm+*.3ds) for interior 3d visualization.
archibase_planet
free

Printer
...rchibase planet
laser printer office equipment computer equipment
printer - 3d model (*.gsm+*.3ds) for interior 3d visualization.
turbosquid
$100

Printer
...er
turbosquid
royalty free 3d model printer for download as on turbosquid: 3d models for games, architecture, videos. (1487819)
turbosquid
$3

Printer
...turbosquid
royalty free 3d model printer for download as max on turbosquid: 3d models for games, architecture, videos. (1670230)
turbosquid
$1

printer
...turbosquid
royalty free 3d model printer for download as max on turbosquid: 3d models for games, architecture, videos. (1595546)
turbosquid
$1

printer
...turbosquid
royalty free 3d model printer for download as max on turbosquid: 3d models for games, architecture, videos. (1595105)
turbosquid
$10

Printer
...id
royalty free 3d model printer for download as max and 3dm on turbosquid: 3d models for games, architecture, videos. (1607146)
turbosquid
$7

Printer
...royalty free 3d model printer for download as ma, ma, and obj on turbosquid: 3d models for games, architecture, videos. (1644580)
turbosquid
$30

Printer
... available on turbo squid, the world's leading provider of digital 3d models for visualization, films, television, and games.
turbosquid
$20

Printer
... available on turbo squid, the world's leading provider of digital 3d models for visualization, films, television, and games.
Test
turbosquid
$99

test
...st
turbosquid
royalty free 3d model test for download as max on turbosquid: 3d models for games, architecture, videos. (1251637)
turbosquid
$63
TEST
...st
turbosquid
royalty free 3d model test for download as max on turbosquid: 3d models for games, architecture, videos. (1446233)
turbosquid
$1
test
...st
turbosquid
royalty free 3d model test for download as fbx on turbosquid: 3d models for games, architecture, videos. (1360941)
3d_export
free

johnny test
...johnny test
3dexport
johnny test 3d
turbosquid
$15
Test
... available on turbo squid, the world's leading provider of digital 3d models for visualization, films, television, and games.
turbosquid
$2

test
... available on turbo squid, the world's leading provider of digital 3d models for visualization, films, television, and games.
turbosquid
free

Test
... available on turbo squid, the world's leading provider of digital 3d models for visualization, films, television, and games.
turbosquid
free

test
... available on turbo squid, the world's leading provider of digital 3d models for visualization, films, television, and games.
turbosquid
free

Test
... available on turbo squid, the world's leading provider of digital 3d models for visualization, films, television, and games.
3d_export
$5
gripper test
...gripper test
3dexport
robot gripper test model