Thingiverse
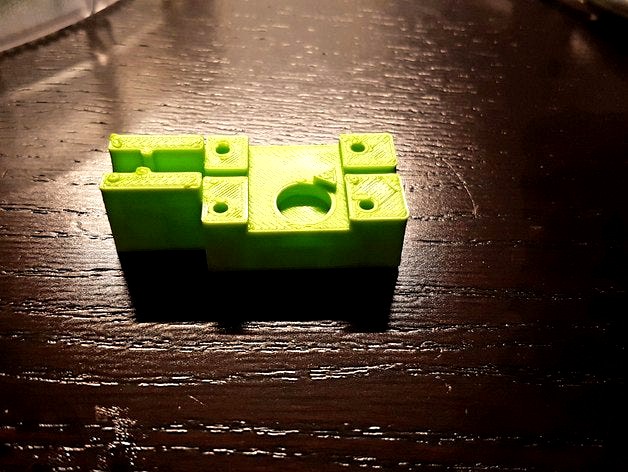
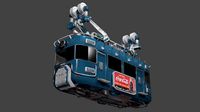
3D Systems Cube 3 cartridge mod V1 by Cube_3
by Thingiverse
Last crawled date: 3 years ago
I've made a V2 of this mod: http://www.thingiverse.com/thing:2060242
Brace yourself......The Cube 3 Firmware has been HACKED!!! :D Some brilliant guys (not me :P) successfully made a Toolbox, to modify the original Firmware, so that it doesn't overwrite the DRM-chip. I was sceptical first but I can confirm that IT WORKS!!! FINALLY the Cube is unchained!!!! :D
Here's the download link with all the instructions you need:http://www.print3dforum.com/showthread.php/900-Cube3-Filament-*SOFTWARE*-Hack-is-here
many many thanks to these guys for their efforts!
Additional Material used:
-Festo QSM-3 (3mm to 3mm)
-PTFE OD 3mm/ID 2mm
-PTFE OD 4mm/ID 3mm
-screws M3x16mm (2Pcs)
Aswell you will need:
-electric drill
-M3 thread cutter
-screw driver-set
The Cube 3 cartridges are well known for beeing unreliable. At least mine tend to break themselve every second time I'm trying to print something. My biggest problem was the tube releasing itself from the little CNC piece mounted to every cartridge. I think the pressure is just to high trough all those sharp angles. So I modified the tubing aswell. Just cut the upper part of the original plastic piece from the extruder needle. Tubes used are 1xID2mm/OD3mm (380mm) and a second tube 4mm ID over the 3mm tube to protect it from folding.
At least one cartridge (I'm using just one and changing the internal filament roll only) works fine now! You can change the filament by disconnecting the tube from the Festo connector, cut the filament flush to the tube, insert the new filament just trough the cogwheel and leave it just before the festo connector begins. Put all together again and make a test-print until the new filament is trough.
Similar models
thingiverse
free

3D Systems Cube 3 cartridge mod V2 (NOW ADJUSTABLE!) by Cube_3
...d leave it just before the festo connector begins. put all together again and make a test-print until the new filament is trough.
thingiverse
free

Cube 3 Extruder MK3 by Kiza
...lamp is a slightly modified version of the cube 3 cartridge saver, designed by qube3bot.https://www.thingiverse.com/thing:2931422
thingiverse
free

Greg's wade v5 - PTFE mod by ThePhilStrongProject
...;s wade extruder v5 which has been modified to allow a ptfe tube to be used to guide the filament.
use 4mm od / 2mm id ptfe tube.
thingiverse
free

IKEA LACK Table Filament Tube by Jgunde
...originally didn't have the ptfe tube but there was to much friction. definitely add the ptfe tube!
this fits 1.75mm filament.
thingiverse
free

Filament guide + bowden tube ender 3
...filament guide + bowden tube ender 3
thingiverse
you will need 1 m6 and 1 m10 bowden connectors and ptfe tube 4mm od.
thingiverse
free

QIDI Tech PTFE Tube Cutting Jig by rssalerno
... ptfe tube cutting jig for qidi tech i and x-one2 printers. cuts standard 2mm id x 4mm od ptfe tube to the 32mm required length.
thingiverse
free

4mm to 6mm OD PTFE Teflon Filament Tube Coupler / Joiner by cncartist
...ess fit into the coupler and should fit quite snug without deformation. the tubes insert ~12-14mm into each side for a good fit.
thingiverse
free

PTFE tube cutter 34mm long by VinceHall
...ptfe tube cutter 34mm long by vincehall
thingiverse
jig for cutting ptfe tube 4mm od x 2mm id x 34mm long
thingiverse
free

Ender 3 Filament Guide by mrares
...lament from anywhere you'd like to store it and straight into the stock extruder.
parts needed:
ptfe tube
4mm ptfe connector
thingiverse
free

DaVinci Pro 3in1 Gear Housing by Lagersuufer
...d that problem.
for my system, i printed the part using an resin printer. i have not tried printing it using a filament printer.
Cartridge
turbosquid
$10
cartridge
...osquid
royalty free 3d model cartridge for download as sldpr on turbosquid: 3d models for games, architecture, videos. (1357854)
3d_export
$10
cartridge filter
...cartridge filter
3dexport
cartridge filter
turbosquid
$1

cartridge
...e 3d model cartridge for download as 3ds, obj, fbx, and blend on turbosquid: 3d models for games, architecture, videos. (1265144)
turbosquid
$25

Cartridge
... available on turbo squid, the world's leading provider of digital 3d models for visualization, films, television, and games.
3d_export
$9

cartridge ce285a
...cartridge ce285a
3dexport
high detailed printer cartridge 3d model.
3d_export
$10

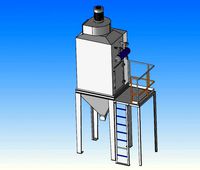
80000 air volume cartridge filter inclined cartridge filter
...000 air volume cartridge filter inclined cartridge filter
3dexport
80000 air volume cartridge filter (inclined cartridge filter)
3d_export
$10

mineral cartridge
...ive soothing & sweet taste to the pure drinking water. the mineral cartridge can be used as substitute of post carbon filter.
turbosquid
$25
5.45x39 Cartridge
... 3d model 5.45x39 cartridge for download as max, 3ds, and obj on turbosquid: 3d models for games, architecture, videos. (1516718)
turbosquid
$25

7.62x39 Cartridge
... 3d model 7.62x39 cartridge for download as 3ds, max, and obj on turbosquid: 3d models for games, architecture, videos. (1303044)
turbosquid
$25
303 Cartridge
...free 3d model 303 cartridge for download as 3ds, max, and obj on turbosquid: 3d models for games, architecture, videos. (1303030)
Mod
design_connected
$13

MOD. 4233 - MOD. 4234 Table Lamp
...mod. 4233 - mod. 4234 table lamp
designconnected
arcahorn mod. 4233 - mod. 4234 table lamp computer generated 3d model.
design_connected
$11

MOD.1095
...mod.1095
designconnected
mod.1095 computer generated 3d model. designed by sarfatti, gino.
3ddd
$1

fireplaces mod Spec
...fireplaces mod spec
3ddd
камин
fireplaces mod spec 180x90x125h
3ddd
free

Flos Mod. 2129
... mod
фабрика: flos
модель: mod. 2129
описание: подвесной светильник, металл, белый, черный.
сайт: www.flos.com
turbosquid
$34
Mod Lamp.c4d
... available on turbo squid, the world's leading provider of digital 3d models for visualization, films, television, and games.
turbosquid
$32

MOD A 001
... available on turbo squid, the world's leading provider of digital 3d models for visualization, films, television, and games.
turbosquid
$29

Maars Mod
... available on turbo squid, the world's leading provider of digital 3d models for visualization, films, television, and games.
turbosquid
$15

Mod 70..
... available on turbo squid, the world's leading provider of digital 3d models for visualization, films, television, and games.
turbosquid
$10

MOD Sofa
... available on turbo squid, the world's leading provider of digital 3d models for visualization, films, television, and games.
turbosquid
$1

Mod-Lite
... available on turbo squid, the world's leading provider of digital 3d models for visualization, films, television, and games.
V1
turbosquid
$35

v1
... available on turbo squid, the world's leading provider of digital 3d models for visualization, films, television, and games.
3d_export
$10

street tree v1
...street tree v1
3dexport
street tree v1
3d_export
$5
potato v1
...potato v1
3dexport
turbosquid
$20

Kitchen V1
...bosquid
royalty free 3d model kitchen v1 for download as max on turbosquid: 3d models for games, architecture, videos. (1153622)
turbosquid
$12
sofa v1
...turbosquid
royalty free 3d model sofa v1 for download as max on turbosquid: 3d models for games, architecture, videos. (1283267)
turbosquid
$3

Chair V1
...urbosquid
royalty free 3d model chair v1 for download as fbx on turbosquid: 3d models for games, architecture, videos. (1486093)
turbosquid
$15

Cupboard v1
...royalty free 3d model cupboard v1 for download as max and fbx on turbosquid: 3d models for games, architecture, videos. (1444568)
3d_export
$5
tram v1
...tram v1
3dexport
3d_export
$8
lumber car v1
...lumber car v1
3dexport
lumber car v1 printable, low poly model.
turbosquid
$20

DELTALIGHT v1
...free 3d model deltalight v1 for download as max, max, and obj on turbosquid: 3d models for games, architecture, videos. (1630928)
Cube
3d_ocean
$5
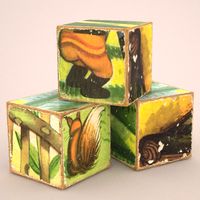
Cubes
...cubes
3docean
children cube cubes model paint toy toys wooden
old wooden children’s cubes.
3d_export
$5
cube
...cube
3dexport
cube
3d_export
$5

cube
...cube
3dexport
cube
3d_export
free

Chemistry cube - cube chimique
...chemistry cube - cube chimique
3dexport
chemistry cube - cube chimique
3d_export
$10

Cube
...cube
3dexport
cube deco
3d_export
free

cube
...cube
3dexport
invented the cube
archibase_planet
free
Cube
...cube
archibase planet
cube
g4 cube - 3d model for interior 3d visualization.
3d_export
$6
cube
...cube
3dexport
cube gamel location
archibase_planet
free
Cube
...cube
archibase planet
home furniture cube
cube - 3d model (*.gsm+*.3ds) for interior 3d visualization.
archibase_planet
free
Cube
...cube
archibase planet
cube block die
cube eazelcom n050113 - 3d model (*.gsm+*.3ds) for interior 3d visualization.
Systems
archibase_planet
free

System
...m
archibase planet
fire alarm system fire alarm box
security light system - 3d model (*.gsm+*.3ds) for interior 3d visualization.
archibase_planet
free

Spider system
...stem spider glass system
spider system to fix glass stefano galli n050912 - 3d model (*.gsm+*.3ds) for interior 3d visualization.
3ddd
$1

Euforia System
...euforia system
3ddd
euforia
euforia system
3d_export
$50

Roof system Truss system 3D Model
...oof system truss system 3d model
3dexport
roof system truss truss stage
roof system truss system 3d model aleksbel 38970 3dexport
3ddd
$1

DVD System
...dvd system
3ddd
dvd , schneider
dvd system
design_connected
free

Seating system
...seating system
designconnected
free 3d model of seating system
3d_export
$5

solar system
...solar system
3dexport
solar system in c4d, with 8k nasa textures
3ddd
$1

Quanta System
...quanta system
3ddd
медицина
quanta system.
лазерное оборудование для медицинских центров
3d_export
$15

solar system
...nd the other the sun, the earth and the moon, the latter has an animation with camera movement included, the files are in spanish
3d_export
$14

missile system
...missile system
3dexport
3
turbosquid
$10

Mountain Bike 3 -3 of 3
...model mountain bike 3 (#3 of 3) for download as fbx and blend on turbosquid: 3d models for games, architecture, videos. (1438752)
turbosquid
$6

Rock 3-3
...urbosquid
royalty free 3d model rock 3-3 for download as obj on turbosquid: 3d models for games, architecture, videos. (1628065)
turbosquid
$29

Books 150 pieces 3-3-3
...books 150 pieces 3-3-3 for download as max, obj, fbx, and stl on turbosquid: 3d models for games, architecture, videos. (1384033)
turbosquid
$3

Genesis 3 Clothing 3
... available on turbo squid, the world's leading provider of digital 3d models for visualization, films, television, and games.
3d_export
$5

hinge 3
...hinge 3
3dexport
hinge 3
3ddd
$1

Розетка 3
...розетка 3
3ddd
розетка
розетка 3
turbosquid
$50

is-3
... available on turbo squid, the world's leading provider of digital 3d models for visualization, films, television, and games.
turbosquid
$10

Mountain Bike 3 -2 of 3
...model mountain bike 3 (#2 of 3) for download as fbx and blend on turbosquid: 3d models for games, architecture, videos. (1438750)
turbosquid
$10

Mountain Bike 1 -3 of 3
...model mountain bike 1 (#3 of 3) for download as fbx and blend on turbosquid: 3d models for games, architecture, videos. (1438743)
3d_export
$5

3 CATS
...3 cats
3dexport
3 cats pen holder