Thingiverse
3D-Printer Controller Box
by Thingiverse
Last crawled date: 5 years, 7 months ago
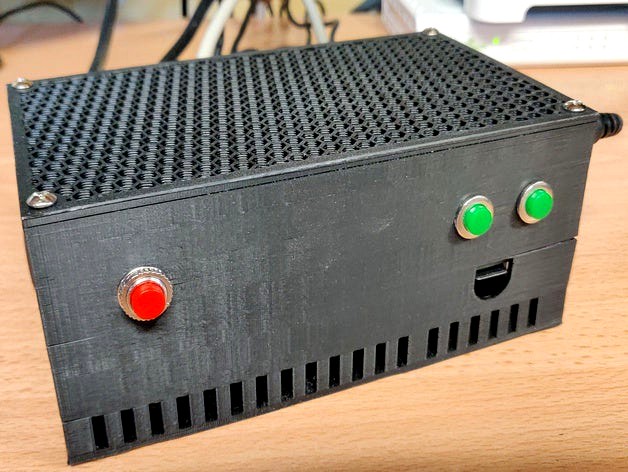
This is a "simple" control-box containing all you need for running two 3D-Printers using two instances of Octoprint (OctoPi) on a Raspberry Pi 3+ (on different ports).
Update 2019-11-01: Added "Big Box 2 v1.stl" - For the "other" relay board (better option).
This gives the following:
Power-control / printer (ex. PSU and lighting).
LED-status (up to two ledstrips).
A Power button for the Raspberry Pi (real shutdown).
Two physical buttons to use for whatever you want (I use them to turn the power on and off to the printers).
Two AM2302 for monitoring temp and humidity (in an enclosure for example).
What I used:
Raspberry Pi 3+
USB-Relay board (but I recommend an easier way with this board instead, With that board you don't have to use one USB-Port to control the relay. I just had the USB-Relay board already. As soon as I get my hands on the recommended relay board I'll add a STL-Box for that. Update: Added "box Big Box 2 v1.stl"
Two Chassis Power Sockets
One Male Power Socket (with breaker):
Two AM2302, but you can use two if you want.
Two Ledstrip
Two green and one red buttons
Two RJ10 female sockets (used to connect the AM2302 sensors).
Two RJ10 male connectors (used to connect the AM2302 sensors).
One power regulator (BEC)
Two 10kohm and two 1kohm resistors (for pull down use).
Some cables of course.
I use the following plugins in Octoprint (installed from the plugin handler):Cancel ObjectsCost EstimationCustom BackgroundDashboardDisplayLayerProgress PluginDragon OrderEnclosure PluginFilament ManagerPreheat ButtonPSU ControlPushbulletRGB Status
The holes are made to fit M3 (just screw them in and let them "self tap"). You will have to drill your RPi:s holes to 3mm. :)
I have not made the power to the raspberry come from the power plug to the printers. It's an "outside" power brick (12-24v) that powers the Pi and LEDs.
Also, I've not configured the LED's yet....
This is not a "how-to" just information about what hardware I used to make it. You need to figure out how to connect stuff and configure the software of course. You can ask me if you have any questions! :)