Thingiverse
3D Printer Build based on TAZ5 by jrbynum
by Thingiverse
Last crawled date: 4 years, 7 months ago
I started a 3D printer build based on the modified TAZ X ends designed by TechsavvyCNC. I decided on using these as they look like they will work good by combining the XZ Axis into one solid piece.
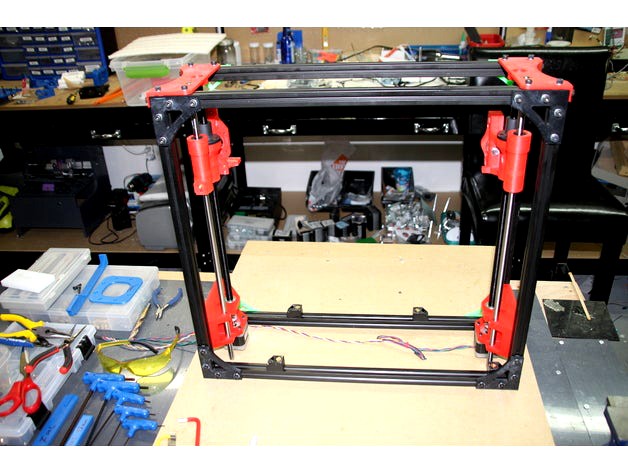
The Y axis is done and the Z Axis installed. Working on finishing the X Axis and wiring everything up.
I made the aluminium bed holder and Y Bed Ends, based on the TAZ design, on my CNC router. I included the dxf and svg files for the bed holder and Y Ends. Thanks to Lulzbot for their opensource mindset. Thats one of the reasons I own a TAZ.
I used VCarve Pro to generate the GCode for the Aluminium parts and have those files as well, if anyone is interested.
I will update the post as a proceed, I am currently waiting on my smoothie board to arrive. I plan on running it through OctoPrint and an extra Pi I have lying around.
UPDATE: 1/1/2017
The left Z-Axis Motor mount doesn't have a Z Adjust screw. I hacked one in for now, see the pictures. I will modify the part when I get some time. Also posted a YouTube video of burning in the Z Axis. https://youtu.be/uQgmlbnne7k
UPDATE: 1/2/2017
Added a z-adjust hole that takes a 4mm heat set insert on the left z-axis motor mount. It should line up with the limit switch located on the left x-axis motor mount. I have not tested it yet, printing now.
UPDATE:
Done. Printer is complete. Assembled everything did a quick calibration and printed the famous Taz Octopus. I still need to replace the left ZAXIS motor mount with the new one that has the leveling screw in it, put everything in a case, tighten belts and fine tune the calibration, but the new ZX Axis parts work really well. So well I am going to add them to my TAZ 4. Here is a video of the start of the first print.
https://youtu.be/MOD8DzfuwYM
And one at the end of the print.
https://youtu.be/AzN_dbVDQ9Q
Time lapse Video of the new left z-axis motor mount with z adjust hole being printed on my other TAZ..
https://youtu.be/pAQe7yjfT0w
Added time lapse video of a skull printing on this printer.https://www.youtube.com/watch?v=fUA1qKmYqqs