Thingiverse

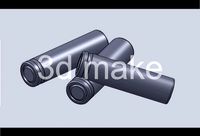
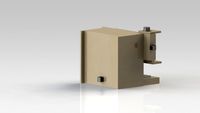
18650 Powerbank Case Box DIY by edwardchew
by Thingiverse
Last crawled date: 3 years, 1 month ago
updated files on Jan2019updated on 02/11/17 with shorter nipple and new pic
Why do i do this? Because no powerbank in the market is good enough for my needs or at their best performance or quality. When I build my own, I know i put the best in it, benefit as below,
true dual 2A output, (it's capable of 3A in actual load test, but phone limits draw at 2A)
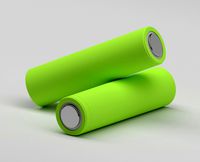
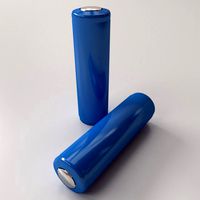
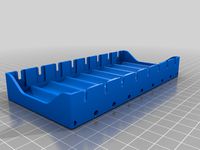
high quality 18650 cell, the same as in Tesla
discharge cut off at 3V, fully utilise capacity of the battery at 80% rule, some in the market cut at high 3.7v, too early
able to recharge the powerbank at 2A, vs only 0.5A for those in market
Here's the video reviewing my powerbank
Performance test : www.youtube.com/watch?v=WTpypuS-RZw
Build video : www.youtube.com/watch?v=FlWlueCm8sU
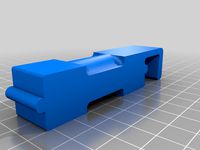
This is remixed due to the original quite narrow width to fit the 18650 batteries. Also the circuit board/module seems a bit different hence require trimming. So I drew one from the ground up based on the dimension from original creator.
It's tested to fit perfectly with the diy powerbank module purchased below.
Single modulehttps://www.banggood.com/Dual-USB-5V-1A-2_1A-Mobile-Power-Bank-18650-Battery-Charger-PCB-Module-Board-p-1031593.html?p=DG23031123036201501P
3x module (more recommended so you have backup module in case...)https://www.banggood.com/3Pcs-Dual-USB-5V-1A-2_1A-Mobile-Power-Bank-18650-Battery-Charger-PCB-Module-Board-p-1133268.html?p=DG23031123036201501P
Panasonic NCR18650B - Good, Cheap, Quality been tested on this project and my drones.
4 of these are soldered in parallel, not series. So you get 4x3400mah, where in the market usually 4x2500mah only.https://www.banggood.com/4pcs-NCR18650B-3400mAH-3_7-V-Unprotected-Rechargeable-Lithium-Battery-p-943453.html?p=DG23031123036201501P
Am very happy with the board above as it's verified to output 2A and input is 2A too! hence it gets "rejuiced" very quickly
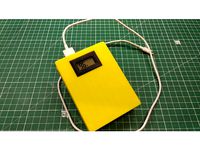
For my own version, I just cover it with a 2.75mm thickness clear acrylic board to show off the inner parts. secured with either tiny screw or hotglue.
As for the LED, I de-solder and relocated it to point forward, just drill a 5mm hole, SLOWLY!
Do comment if it works well for you, I'll be happy to hear that
3D printer that i usedhttps://www.banggood.com/DIY-Creality-CR-10-3D-Printer-300300400mm-Printing-Size-1_75mm-0_4mm-Nozzle-p-1085645.html?p=DG23031123036201501P
Why do i do this? Because no powerbank in the market is good enough for my needs or at their best performance or quality. When I build my own, I know i put the best in it, benefit as below,
true dual 2A output, (it's capable of 3A in actual load test, but phone limits draw at 2A)
high quality 18650 cell, the same as in Tesla
discharge cut off at 3V, fully utilise capacity of the battery at 80% rule, some in the market cut at high 3.7v, too early
able to recharge the powerbank at 2A, vs only 0.5A for those in market
Here's the video reviewing my powerbank
Performance test : www.youtube.com/watch?v=WTpypuS-RZw
Build video : www.youtube.com/watch?v=FlWlueCm8sU
This is remixed due to the original quite narrow width to fit the 18650 batteries. Also the circuit board/module seems a bit different hence require trimming. So I drew one from the ground up based on the dimension from original creator.
It's tested to fit perfectly with the diy powerbank module purchased below.
Single modulehttps://www.banggood.com/Dual-USB-5V-1A-2_1A-Mobile-Power-Bank-18650-Battery-Charger-PCB-Module-Board-p-1031593.html?p=DG23031123036201501P
3x module (more recommended so you have backup module in case...)https://www.banggood.com/3Pcs-Dual-USB-5V-1A-2_1A-Mobile-Power-Bank-18650-Battery-Charger-PCB-Module-Board-p-1133268.html?p=DG23031123036201501P
Panasonic NCR18650B - Good, Cheap, Quality been tested on this project and my drones.
4 of these are soldered in parallel, not series. So you get 4x3400mah, where in the market usually 4x2500mah only.https://www.banggood.com/4pcs-NCR18650B-3400mAH-3_7-V-Unprotected-Rechargeable-Lithium-Battery-p-943453.html?p=DG23031123036201501P
Am very happy with the board above as it's verified to output 2A and input is 2A too! hence it gets "rejuiced" very quickly
For my own version, I just cover it with a 2.75mm thickness clear acrylic board to show off the inner parts. secured with either tiny screw or hotglue.
As for the LED, I de-solder and relocated it to point forward, just drill a 5mm hole, SLOWLY!
Do comment if it works well for you, I'll be happy to hear that
3D printer that i usedhttps://www.banggood.com/DIY-Creality-CR-10-3D-Printer-300300400mm-Printing-Size-1_75mm-0_4mm-Nozzle-p-1085645.html?p=DG23031123036201501P
Similar models
thingiverse
free

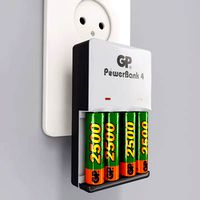
18650 Holder With Charge Indicator
...r_warehouse=cn
i changed the distance between the 2 charging taps to 67,4mm. now my battery fits nicely inside (it's 67,5mm).
thingiverse
free

Portable Power Bank Phone Charger by JD_Printing
...h without solder tabs available just about everywhere. i constructed a battery powered spot welder to attach the soldering tabs.
grabcad
free

Battery Charger Board
...board
grabcad
automatic protection! dual usb 5v 1a 2.1a mobile power bank 18650 lithium battery charger board module digital pcb
thingiverse
free

3D printed solar power bank by hserimer
...otection-board-boost-power-module-power-bank-charger-board-p-1357723.html )
18650 3v7 li-ion battery
5v 100ma photovoltaic panel.
thingiverse
free

Game Boy Battery Charger Box
...dapter, https://amzn.to/2xwxbyr
rechargeable battery 3.7v, https://amzn.to/35jicio
donate btc: 1bubceiryeucgrgsgfkuw6eymsbdisgczf
thingiverse
free

Solar power bank 5000mAh
...ompletly charge the battery, but if you let the solar panel under a bright sun, it will charge the battery between 4 and 5 hours.
thingiverse
free

Bluetooth Boom Box by DudeMitHut
...ooth audio reciever modul,
1a 5v micro-usb-tp4056 lithium batterie charger modul te420,
1x micro usb breakout board
and a switch.
thingiverse
free

Powerbank 1S10P 18650 2xUSB by norbiciat04
...om another project: https://www.thingiverse.com/thing:2526936
i combine several pieces in z-suite (attached .zproj & .zcode).
thingiverse
free

Dual charger battery 18650 cradle by Rustam112
...o-usb-18650-lithium-battery-charging-board-charger-module-protection-dual-functions/32467859026.html?spm=2114.13010608.0.0.uxfvfx
thingiverse
free

Most compact TP4056 Li-ion 18650 charger by dominos96
...-spring-flashlight-spring-conical-compression-spring-p-86054.html?rmmds=search),
and of course some wire to connect everything :d
Edwardchew
thingiverse
free

Gopro Alu Bar Mount by edwardchew
...ww.banggood.com/diy-creality-cr-10-3d-printer-300300400mm-printing-size-1_75mm-0_4mm-nozzle-p-1085645.html?p=dg23031123036201501p
thingiverse
free

Double Alu Bar Clamp Extension by edwardchew
...make an adjustable length bar!
just screw onto one bar on either end of the 2 bars so it becomes a clamp and end stopper as well.
thingiverse
free

Hexagon Cover for M5 Screw Gopro Knob Remix by edwardchew
...on this is made is because as you push the knob in, the resistance pushes the screw out of the knob, so this cover act as a stop.
thingiverse
free

Skyhunter 1.8m Servo Horn Protector by edwardchew
...icehttps://www.banggood.com/2x-emax-es08ma-ii-12g-mini-metal-gear-analog-servo-for-rc-model-p-1065375.html?p=dg23031123036201501p
thingiverse
free

Tripod Mount Base Cube Naked by edwardchew
...ww.banggood.com/diy-creality-cr-10-3d-printer-300300400mm-printing-size-1_75mm-0_4mm-nozzle-p-1085645.html?p=dg23031123036201501p
thingiverse
free

FMS 70mm EDF Fan Cap Replacement by edwardchew
...with-2845-kv2750-motor-for-rc-airplane-p-1023640.html?utm_campaign=t0002_1123036&utm_content=11033&p=dg23031123036201501p
thingiverse
free
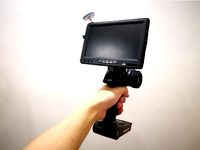
Austar AX5S FPV Display Gopro Mount by edwardchew
...ww.banggood.com/diy-creality-cr-10-3d-printer-300300400mm-printing-size-1_75mm-0_4mm-nozzle-p-1085645.html?p=dg23031123036201501p
thingiverse
free

Suspension Pin for 133% Ossum Jeep by edwardchew
...ww.banggood.com/diy-creality-cr-10-3d-printer-300300400mm-printing-size-1_75mm-0_4mm-nozzle-p-1085645.html?p=dg23031123036201501p
thingiverse
free

18500 Li-Ion Battery Holder for charging Frsky X-lite by edwardchew
...ww.banggood.com/diy-creality-cr-10-3d-printer-300300400mm-printing-size-1_75mm-0_4mm-nozzle-p-1085645.html?p=dg23031123036201501p
thingiverse
free

Micromake Delta Printer LED Strip Lighting Mount by edwardchew
...striphttps://www.banggood.com/5m-white-3528-smd-led-strip-light-non-waterproof-12v-dc-300-led-p-77079.html?p=dg23031123036201501p
Powerbank
3d_ocean
$5
Powerbank
...ls: downloadable model packages containing all necessary texture files. the .obj package comes with an additional materials file.
3d_export
$5

Powerbank
...powerbank
3dexport
turbosquid
$1

powerbank
... available on turbo squid, the world's leading provider of digital 3d models for visualization, films, television, and games.
turbosquid
$1

powerbank
... available on turbo squid, the world's leading provider of digital 3d models for visualization, films, television, and games.
turbosquid
$1

powerbank
... available on turbo squid, the world's leading provider of digital 3d models for visualization, films, television, and games.
3d_export
$5

Powerbank
..., stl obj and fbx files polygons : 9991 vertices : 10008 textures: pbr textures painted with substance painter 1k textures inside
3d_export
$20

GP Powerbank Charger 3D Model
...tery charger powerbank
gp powerbank charger 3d model download .c4d .max .obj .fbx .ma .lwo .3ds .3dm .stl dixiony 103086 3dexport
turbosquid
$10

Ttec Powerbank 5200 Mah
... available on turbo squid, the world's leading provider of digital 3d models for visualization, films, television, and games.
turbosquid
$10
Accu charger - Battery - Powerbank - rechargeable
... available on turbo squid, the world's leading provider of digital 3d models for visualization, films, television, and games.
thingiverse
free
Powerbank
...efinitely is not a way for true diyer, right? it's time to build your own powerbank!
this project is also available on github
18650
3d_export
$10
battery 18650
...battery 18650
3dexport
battery 18650
turbosquid
$10
18650 Li-ion Battery
... available on turbo squid, the world's leading provider of digital 3d models for visualization, films, television, and games.
3d_export
$15
lithium ion 18650 battery
...e up render. - all parts and materials are logically named. other formats ================= - collada (.dae) - autodesk fbx - obj
3d_export
$10
18650 lithium battery
...your software before making a purchase is highly recommend. -in case of problems with the 3d model, do not hesitate to contact me
3d_export
free

solar rechargeable single led flashing light
...light 3dexport unit was design for housing a single 18650 lithium-ion battery and mini solar panel 55mm x 41mm-...
3d_export
$12

Emoji 042 Loudly Crying With Tears
...spec/gloss textures<br>- blend (cycles): metal/roughnes textures<br>geometry:<br>- units: centimeters<br>- polygons: 18650lt;br>- vertex: 18822<br>- triangles: 2<br>- quads: 18648<br>- ngons: 0<br>- vertex...
thingiverse
free
18650
...18650
thingiverse
18650 power supply, vase mode
thingiverse
free
18650 CASE
...18650 case
thingiverse
18650 case!
thingiverse
free
18650 holder
...18650 holder
thingiverse
18650 holder
thingiverse
free
18650 dispenser
...18650 dispenser
thingiverse
18650 dispenser for 10 batteries.
Diy
3d_export
free
DIY 3D Printer
...diy 3d printer
3dexport
diy 3d printer model
turbosquid
$10
Diy tiered
...l diy tiered for download as max, max, max, max, fbx, and obj on turbosquid: 3d models for games, architecture, videos. (1603709)
turbosquid
$3
Diy Desk to Bench
...odel diy desk to bench for download as 3ds, max, obj, and fbx on turbosquid: 3d models for games, architecture, videos. (1506589)
turbosquid
$2

DIY Moon Light
...model diy moon light for download as obj, fbx, blend, and dae on turbosquid: 3d models for games, architecture, videos. (1501170)
3d_export
$8
DIY CNC Router 3D Model
...diy cnc router 3d model
3dexport
cnc; router; diy; homemade
diy cnc router 3d model maikeru86 58463 3dexport
turbosquid
$5
Diy Kitchen Cabinets
...itchen cabinets for download as 3ds, obj, fbx, blend, and dae on turbosquid: 3d models for games, architecture, videos. (1197373)
3d_export
free

Download free Diying Plant 3D Model
...download free diying plant 3d model
3dexport
diying plant blender
diying plant 3d model visitorsama 98607 3dexport
3ddd
$1
DIY coffee table + decor
... рамка для фото
кофейный столик diy 400х350х600(h) мм. моделился по фото. внимание: материалы - corona.
turbosquid
$3
Diy Wire Lamp Shade
...free 3d model diy wire lamp shade for download as 3ds and fbx on turbosquid: 3d models for games, architecture, videos. (1347605)
cg_studio
$12

DIY MONGOLIAN LAMB STOOLS3d model
... hair soft pile white
.max - diy mongolian lamb stools 3d model, royalty free license available, instant download after purchase.
Case
3d_export
$1

case
...case
3dexport
case
archibase_planet
free

Case
...case
archibase planet
showcase show-case glass case
glass-case + cakes - 3d model for interior 3d visualization.
archibase_planet
free

Case
...case
archibase planet
showcase show-case glass case
glass-case for chips - 3d model for interior 3d visualization.
archibase_planet
free

Case
...case
archibase planet
case shelving drawer
case - 3d model for interior 3d visualization.
archibase_planet
free

Case
...case
archibase planet
case rack locker
case - 3d model for interior 3d visualization.
archibase_planet
free

Case
...case
archibase planet
case drawer kitchen furniture
case - 3d model for interior 3d visualization.
archibase_planet
free

Case
...case
archibase planet
case cupboard shelving
glass case - 3d model for interior 3d visualization.
archibase_planet
free

Case
...case
archibase planet
case handbag suitcase
case - 3d model (*.gsm+*.3ds) for interior 3d visualization.
archibase_planet
free

Case
...case
archibase planet
case suitcase
case 5 - 3d model (*.gsm+*.3ds) for interior 3d visualization.
archibase_planet
free

Case
...case
archibase planet
locker case dresser
case - 3d model (*.gsm+*.3ds) for interior 3d visualization.
Box
archibase_planet
free

Box
...box
archibase planet
box carton cardboard box
box 2 - 3d model (*.3ds) for interior 3d visualization.
archibase_planet
free

Box
...box
archibase planet
carton cardboard box box
box 1 - 3d model (*.3ds) for interior 3d visualization.
3d_export
$6

box
...box
3dexport
box
3d_export
$5

Box
...box
3dexport
box
3d_export
$5

box
...box
3dexport
box
3d_export
$5

box
...box
3dexport
box
archibase_planet
free

Box
...box
archibase planet
box box for paper notebook pencil
box - 3d model (*.gsm+*.3ds) for interior 3d visualization.
archibase_planet
free

Box
...box
archibase planet
box carton cardboard box
box n170111 - 3d model (*.gsm+*.3ds) for interior 3d visualization.
archibase_planet
free

Box
...box
archibase planet
box carton cardboard box
box n050411 - 3d model (*.gsm+*.3ds) for interior 3d visualization.
archibase_planet
free

Boxes
...boxes
archibase planet
boxes box case bin
boxes n281213 - 3d model (*.gsm+*.3ds+*.max) for interior 3d visualization.