Thingiverse
009 or N gauge Turntable Servo drive 100mm
by Thingiverse
Last crawled date: 4 years, 2 months ago
Thingiverse won't accept the illustrations
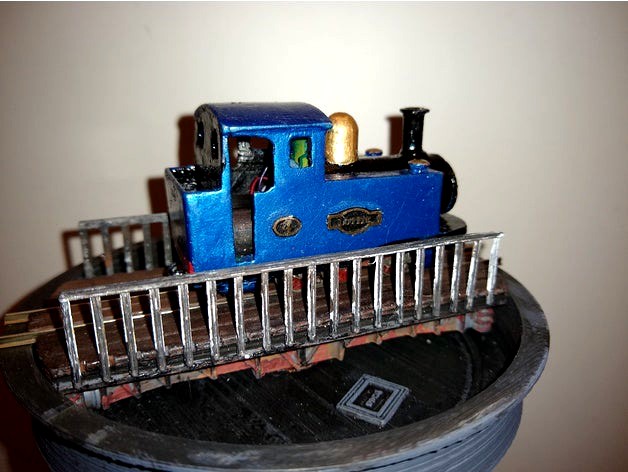
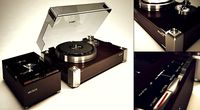
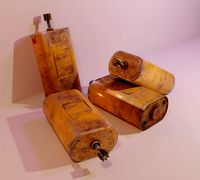
NEW TURNTABLE
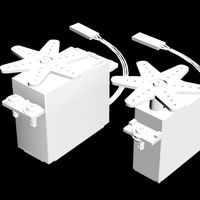
This is a stepper motor controlled model turntable
the bed is 100mm long, designed for 009 but will fit short N gauge locos (loose the fences)
The Arduino code will follow in the coming weeks.
It is Primarily for DCC++ JMRI CMRI control but I will include manual button control for up to 6 rays (with forward & reverse positions for each.
I have a prototype working manually - but not as part of a layout. It rotates smoothly and has very little backlash. so it's just a matter of software..
Other Materials required:
009/N track (100mm)
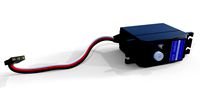
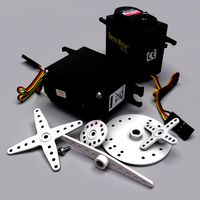
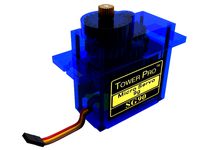
28BYJ48 Servo & Driver
3 or 3.5mm screws & nuts
Copper foil (guitar scratch-plate hum screening type or thin copper sheet) 30mmx30mm.
2 Electric guitar strings (top and bottom E)
Short piece of 2.5mm Solid copper wire (UK socket cable) 50mm
Arduino
C/MRI library for Arduino (for JMRI control)
Rotary
handful of push switches LEDs/ resistors etc
Ultra mini microswitch 125V 5A
5V Power supply
hook-up cable, tools & accessories
2 axles 6mm 009/N gauge wheels (solid metal type but others may work)
Printing
print 3 spacers, 2 handrails and 1 of everything else. I used ABS with supports no Raft on Acetone sprayed, ABS wiped, Kapton covered glass in an old covered CTC dual head
Assembly
Remove all the supports
Prep the tub
paint before assembly and handrails
1countersink the 3 holes in the base to suit your screws.Screws need to be long enough to pass through tub, spacer and mount with nut.
sitck a piece of copper foil over sentre, knife round the edges and push through the holes to make 2 semi circle tracks. Add more tape strips from each track to the back and solder solder connection wires, one to each semi circle. Glue down wires as strain relief
fill the rest of the holes with CA gel glue and kicker spray. Get the foil and glue as smooth as possible. Check that the 2 semi circle tracks are not shorted.Use grid covers to mask screw heads.
Assemble Bridge
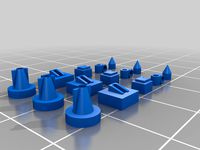
Strip approx 30mm 2.5mmSQ solid copper cable Straighten it.
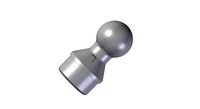
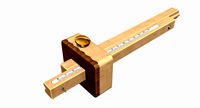
using a file or Dremel form shoulder in the wire stepping down to approx 1mm diameter forming a step taper. there should be about 4mm of 1mm diameter wire on the end Round the 1mm end over. Using flat sidecutters cut about 3mm of 2,5 so there is a 7mm length 2.5 flat ended stepped down to 1.0mm round ended. See TTPin.JPG included above. When finished, make another.
make 2 small springs from a length of thin guitar E string a slow drill and a 1mm drill bit as a former. about 5mm of close wound spring Pull it out to about 15mm long, trim and make another.
glue outer track bed to bridge on one side. drill 3 small holes from under the bridge to mount the other side. This will be obvious. Get this exact or the turntable won't line up.use a length of track to get the sleeper spacing right. Don't fit the centre bed yet. The 4 small holes in the bridge should be directly under the rails and the large hole centre.
Pull off 4 wheels from the axles and fit flanges innermost using thick wire as axles.
drop the tapered copper pins taper down through the top face of 2 diagonal small holes
3.5mm screw through centre of bridge tighten a lock nut behind and trim to 20mm long protruding from underside of bridge. Add another locknut. 3.5mm sc
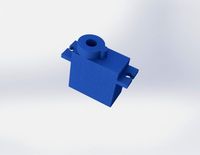
clean out coupling. insert 3.5mm nut into square radial hole.align with axial hole
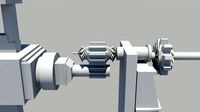
ensure motor spindle is a snug fit in coupling then assemble the motor snd mount. Screw bridge assembly through tub into motor mount until wheels run smoothly on rail. tighten locknut, add handrails.
The timber boards relief in decking will be concealed by squish.
blutack the centre deck in position. check for clearance.
NEW TURNTABLE
This is a stepper motor controlled model turntable
the bed is 100mm long, designed for 009 but will fit short N gauge locos (loose the fences)
The Arduino code will follow in the coming weeks.
It is Primarily for DCC++ JMRI CMRI control but I will include manual button control for up to 6 rays (with forward & reverse positions for each.
I have a prototype working manually - but not as part of a layout. It rotates smoothly and has very little backlash. so it's just a matter of software..
Other Materials required:
009/N track (100mm)
28BYJ48 Servo & Driver
3 or 3.5mm screws & nuts
Copper foil (guitar scratch-plate hum screening type or thin copper sheet) 30mmx30mm.
2 Electric guitar strings (top and bottom E)
Short piece of 2.5mm Solid copper wire (UK socket cable) 50mm
Arduino
C/MRI library for Arduino (for JMRI control)
Rotary
handful of push switches LEDs/ resistors etc
Ultra mini microswitch 125V 5A
5V Power supply
hook-up cable, tools & accessories
2 axles 6mm 009/N gauge wheels (solid metal type but others may work)
Printing
print 3 spacers, 2 handrails and 1 of everything else. I used ABS with supports no Raft on Acetone sprayed, ABS wiped, Kapton covered glass in an old covered CTC dual head
Assembly
Remove all the supports
Prep the tub
paint before assembly and handrails
1countersink the 3 holes in the base to suit your screws.Screws need to be long enough to pass through tub, spacer and mount with nut.
sitck a piece of copper foil over sentre, knife round the edges and push through the holes to make 2 semi circle tracks. Add more tape strips from each track to the back and solder solder connection wires, one to each semi circle. Glue down wires as strain relief
fill the rest of the holes with CA gel glue and kicker spray. Get the foil and glue as smooth as possible. Check that the 2 semi circle tracks are not shorted.Use grid covers to mask screw heads.
Assemble Bridge
Strip approx 30mm 2.5mmSQ solid copper cable Straighten it.
using a file or Dremel form shoulder in the wire stepping down to approx 1mm diameter forming a step taper. there should be about 4mm of 1mm diameter wire on the end Round the 1mm end over. Using flat sidecutters cut about 3mm of 2,5 so there is a 7mm length 2.5 flat ended stepped down to 1.0mm round ended. See TTPin.JPG included above. When finished, make another.
make 2 small springs from a length of thin guitar E string a slow drill and a 1mm drill bit as a former. about 5mm of close wound spring Pull it out to about 15mm long, trim and make another.
glue outer track bed to bridge on one side. drill 3 small holes from under the bridge to mount the other side. This will be obvious. Get this exact or the turntable won't line up.use a length of track to get the sleeper spacing right. Don't fit the centre bed yet. The 4 small holes in the bridge should be directly under the rails and the large hole centre.
Pull off 4 wheels from the axles and fit flanges innermost using thick wire as axles.
drop the tapered copper pins taper down through the top face of 2 diagonal small holes
3.5mm screw through centre of bridge tighten a lock nut behind and trim to 20mm long protruding from underside of bridge. Add another locknut. 3.5mm sc
clean out coupling. insert 3.5mm nut into square radial hole.align with axial hole
ensure motor spindle is a snug fit in coupling then assemble the motor snd mount. Screw bridge assembly through tub into motor mount until wheels run smoothly on rail. tighten locknut, add handrails.
The timber boards relief in decking will be concealed by squish.
blutack the centre deck in position. check for clearance.
Similar models
thingiverse
free

H0e/H0m/009 Turntable by InnlandsModeller
...y n scale. glue a piece of track to the top and you are more or less, ready to go. hole through the middle for connecting wires.
thingiverse
free
N Scale ACI Scanner
...cleanup of parts)
1mm diameter drill bit in pin vise(for reaming out holes)
nippers(for cutting parts, cleanup of parts)
tweezers
thingiverse
free

009 Narrow Guage Tank Locomotive 0-6-4 by bluetobits
..." donor chassis with funnel screw.
also required are 2 x n gauge wheel axles,
one 10mmx2.5 mm screw, 6 washers & 2 nuts.
thingiverse
free

N gauge turntable by eisenficker
...e by eisenficker
thingiverse
n gauge well type turntable with module 0.5 gear ring , can be used with the bridge from peco nb55
thingiverse
free

N-gauge turntable bridge by eisenficker
...ell with module 0.5 gear ring.
to improve movement i etched some brass plates with metal discs as wheels for my own turntable.
thingiverse
free

N-Scale railroad turntable bridge by walts
... foot long bridge for n-scale turntable. print this in 2 sections and glue together - 28 mm and 8mm - to avoid support problems.
thingiverse
free

Skewed Truss Bridge - N Scale by LevelUpRailways
...ays
thingiverse
n scale skewed truss bridge designed for two tracks at 1.25" spacing. parts are assembled using super glue.
thingiverse
free

N SCALE STONE WATER BRIDGE for 2 TRACKS by SLMODELRR
...hingiverse
n scale stone water bridge for 2 tracks
the three pieces snap together tightly and you should glue for added support.
cg_trader
free

2 gauge copper ring terminal
...2 gauge copper ring terminal
cg trader
2 gauge copper ring terminal solderless wire terminal
thingiverse
free

wire nut by jharsey0002
...wire nut by jharsey0002
thingiverse
wire nut for 12 gauge wire or smaller that the insulation will slide through.
009
turbosquid
$14

Pillow 009
...bosquid
royalty free 3d model pillow 009 for download as max on turbosquid: 3d models for games, architecture, videos. (1464417)
turbosquid
$25

Chair 009
...d
royalty free 3d model chair 009 for download as ma and fbx on turbosquid: 3d models for games, architecture, videos. (1516124)
turbosquid
$20

Toilet 009
...lty free 3d model toilet 009 for download as ma, obj, and fbx on turbosquid: 3d models for games, architecture, videos. (1276733)
turbosquid
$5

Module 009
...ty free 3d model module 009 for download as max, fbx, and obj on turbosquid: 3d models for games, architecture, videos. (1687732)
turbosquid
$40

TIRE 009
... available on turbo squid, the world's leading provider of digital 3d models for visualization, films, television, and games.
turbosquid
$39

Dresser 009
... available on turbo squid, the world's leading provider of digital 3d models for visualization, films, television, and games.
turbosquid
$39

Bed 009
... available on turbo squid, the world's leading provider of digital 3d models for visualization, films, television, and games.
turbosquid
$35

Pergola 009
... available on turbo squid, the world's leading provider of digital 3d models for visualization, films, television, and games.
turbosquid
$30

Design 009
... available on turbo squid, the world's leading provider of digital 3d models for visualization, films, television, and games.
turbosquid
$25

Building 009
... available on turbo squid, the world's leading provider of digital 3d models for visualization, films, television, and games.
Turntable
3d_export
$60

turntable
...turntable
3dexport
turntable with vynil record.
3ddd
$1
Turntable
...turntable
3ddd
проигрыватель
classic turntable
archibase_planet
free

Turntable
...
turntable record-player player
turntable technics 1200 mk2 n230914 - 3d model (*.gsm+*.3ds+*.max) for interior 3d visualization.
turbosquid
$250

Turntable
...osquid
royalty free 3d model turntable for download as blend on turbosquid: 3d models for games, architecture, videos. (1535395)
turbosquid
$75
Turntable
...lty free 3d model turntable for download as 3ds, max, and obj on turbosquid: 3d models for games, architecture, videos. (1298484)
turbosquid
$29

Turntable
... available on turbo squid, the world's leading provider of digital 3d models for visualization, films, television, and games.
turbosquid
$8

Turntable
... available on turbo squid, the world's leading provider of digital 3d models for visualization, films, television, and games.
turbosquid
free

Turntable
... available on turbo squid, the world's leading provider of digital 3d models for visualization, films, television, and games.
3d_ocean
$5

Turntable
...ygonal model, easy to animate. - poly count: 272 - formats: max /obj /fbx/3ds/dxf - high detail was preserved with 2048...
3d_ocean
$25
Turntable
...lly created with 3ds max 2012 -max file with v-ray adv 2.10 materials - unit system is set to centimeters. model is built to r...
100Mm
turbosquid
$4

Mini Lathe Chuck Cover Plate - 100mm
...odel mini lathe chuck cover plate - 100mm for download as stl on turbosquid: 3d models for games, architecture, videos. (1588145)
3ddd
$1
Лестница белая
...3ddd габаритные размеры h= 3210mm 3510 х 2110 х 100mm ...
3ddd
$1
Подушка #1
...3ddd подушка производитель: - модель: подушка размеры: w-530mm, d-340mm, h-100mm ...
3d_export
$12
emu36 train
...emu36 train 3dexport train size 450mm x 80mm x 100mmlt;br>assembled 3...
3d_export
$5
tipping sphere 100
...rear unit of three-way tipper trailers. tube weldable design, 100mm diameter. made with se...
3ddd
free
Caden Flushmount
...hardwarehttp://www.restorationhardware.com _ модель: caden flushmount large размеры: w-355mm, d-355mm, h-100mm ...
3ddd
$1

Domi Swing Arm Wall Sconce
..._ модель: domi swing arm wall sconce размеры: w-295mm, d-100mm ...
3d_export
$45
JuiceBox1 liter 3D Model
...sour cream box supermarket market orange apple refrigerator liter 100mm juicebox1 liter 3d model rophaaa 19874...
3d_export
$25

Juice box 1 3D Model
...sour cream box supermarket market orange apple refrigerator liter 100mm juice box 1 3d model rophaaa 22187...
3d_export
$20
Metal Sculpture CNC Machinable
...amazing art can be fabricated by cnc machining a 100*100*100mm polished metal block. cnc milling method would be the...
Gauge
3d_ocean
$10
Gauges
...rim to them. each gauge has an xpresso tag to give them an automatic animation without the need for keyframing and can be chan...
3d_export
$5

pressure gauge
...pressure gauge
3dexport
pressure gauge
3d_export
$5
gauge protector
...gauge protector
3dexport
gauge protector
3d_export
$5
Gauge 3D Model
...gauge 3d model
3dexport
gauge pressure gas air liquid
gauge 3d model fau 71180 3dexport
3d_export
$5

protected pressure gauge
...protected pressure gauge
3dexport
protected pressure gauge
3d_export
$5

hard gauge protector
...hard gauge protector
3dexport
hard gauge protector
turbosquid
$29
Screw Gauge
... available on turbo squid, the world's leading provider of digital 3d models for visualization, films, television, and games.
turbosquid
$29
Marking Gauge
... available on turbo squid, the world's leading provider of digital 3d models for visualization, films, television, and games.
turbosquid
$20

Blade Gauge
... available on turbo squid, the world's leading provider of digital 3d models for visualization, films, television, and games.
3d_export
$5
12 Gauge 3D Model
...12 gauge 3d model
3dexport
shotgun shell gauge 12
12 gauge 3d model pirog 54511 3dexport
Servo
turbosquid
$30
Servo
...d model servo for download as obj, blend, dae, stl, and sldpr on turbosquid: 3d models for games, architecture, videos. (1394011)
3d_export
$5

servo motor
...tor
3dexport
it's a simple part of servo motor 0.75kw for used in machines assembly to show specified motor in own project.
turbosquid
$1
Servo Moter
...quid
royalty free 3d model servo moter for download as blend on turbosquid: 3d models for games, architecture, videos. (1650816)
turbosquid
free
Motor/Servo
...osquid
royalty free 3d model motor/servo for download as obj on turbosquid: 3d models for games, architecture, videos. (1522522)
turbosquid
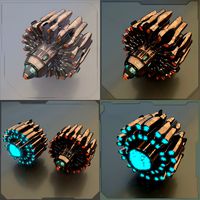
$60

Servo Skull
...
royalty free 3d model servo skull for download as ma and fbx on turbosquid: 3d models for games, architecture, videos. (1318573)
3d_export
$5
Servo 3D Model
...rvo 3d model
3dexport
servo
servo 3d model download .c4d .max .obj .fbx .ma .lwo .3ds .3dm .stl pasqualesiciliano 104590 3dexport
turbosquid
$50
Servo Motor
... available on turbo squid, the world's leading provider of digital 3d models for visualization, films, television, and games.
turbosquid
$49
Servo Motor
...model servo motor for download as 3ds, max, obj, fbx, and stl on turbosquid: 3d models for games, architecture, videos. (1324153)
turbosquid
$29
Servo Set
... available on turbo squid, the world's leading provider of digital 3d models for visualization, films, television, and games.
turbosquid
$10
machine servo
... available on turbo squid, the world's leading provider of digital 3d models for visualization, films, television, and games.
Drive
turbosquid
$90
Drive
...turbosquid
royalty free 3d model drive for download as blend on turbosquid: 3d models for games, architecture, videos. (1654393)
3d_export
$10

cycloidal drive
...cycloidal drive
3dexport
cycloidal drive
3d_ocean
$5

Flash Drive
...h drive included : – materials – scene ( lighs / room ) – .c4d + .obj for any questions please feel free to contact me thank you.
3d_ocean
$5

Usb drive
...s shaders and a lighting setup. it also has a small animation of it going in and out. i saved it out as both a .blend file and...
3d_ocean
$5

Pen Drive
...est computer drive game model good low poly new pen pen drive textured unwrapped uv very low poly
a very beautiful low poly model
3d_ocean
$10

External hard drive
... is a detailed model of a trekstor external hard drive. you can easily modify the label on the top. simply edit the text objects.
turbosquid
$60

Star Drive
...squid
royalty free 3d model star drive for download as blend on turbosquid: 3d models for games, architecture, videos. (1254314)
turbosquid
$50
Star Drive
...squid
royalty free 3d model star drive for download as blend on turbosquid: 3d models for games, architecture, videos. (1263524)
turbosquid
$45

Star Drive
...squid
royalty free 3d model star drive for download as blend on turbosquid: 3d models for games, architecture, videos. (1287060)
turbosquid
$40
Star Drive
...squid
royalty free 3d model star drive for download as blend on turbosquid: 3d models for games, architecture, videos. (1261902)
N
3ddd
$1
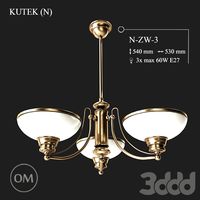
KUTEK (N) N-ZW-3
...kutek (n) n-zw-3
3ddd
kutek
3d модель люстра (n) n-zw-3 фабрики kutek. в архиве: max2012, obj, fbx, mat.(два варианта металла)
3ddd
$1

KUTEK (N) N-ZW-2
...kutek (n) n-zw-2
3ddd
kutek
3d модель люстра (n) n-zw-2 фабрики kutek. в архиве: max2012, obj, fbx, mat.(два варианта металла)
3ddd
$1
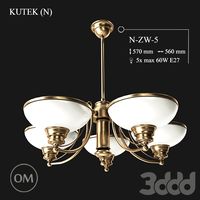
KUTEK (N) N-ZW-5
...kutek (n) n-zw-5
3ddd
kutek
3d модель люстра (n) n-zw-5 фабрики kutek. в архиве: max2012, obj, fbx, mat.(два варианта металла)
3ddd
$1
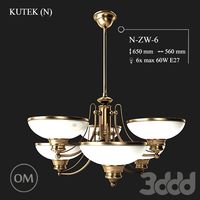
KUTEK (N) N-ZW-6
...kutek (n) n-zw-6
3ddd
kutek
3d модель люстра (n) n-zw-6 фабрики kutek. в архиве: max2012, obj, fbx, mat.(два варианта металла)
3ddd
$1
KUTEK (N) N-K-2-A
...3ddd
kutek
3d модель бра (n) n-k-2-a фабрики kutek. в архиве: max2012, obj, fbx, mat. (2 варианта металла и 5 вариантов абажуров)
3ddd
$1
KUTEK (N) N-ZW-3-A
...
kutek
3d модель люстра (n) n-zw-3-a фабрики kutek. в архиве: max2012, obj, fbx, mat. (2 варианта металла и 5 вариантов абажуров)
3ddd
$1

KUTEK (N) N-K-1-A
...3ddd
kutek
3d модель бра (n) n-k-1-a фабрики kutek. в архиве: max2012, obj, fbx, mat. (2 варианта металла и 5 вариантов абажуров)
design_connected
$16
N°215
...n°215
designconnected
dcw éditions n°215 computer generated 3d model. designed by gras, bernard-albin.
turbosquid
$8

N for Nose
...bosquid
royalty free 3d model n for nose for download as max on turbosquid: 3d models for games, architecture, videos. (1693062)
turbosquid
$5

Letter N
...urbosquid
royalty free 3d model letter n for download as max on turbosquid: 3d models for games, architecture, videos. (1408490)