Thingiverse

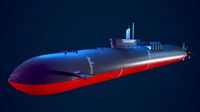
K-141 Kursk by Ceravyn
by Thingiverse
Last crawled date: 2 years, 11 months ago
K-141 Kursk was a Russian Oscar II -class nuclear powered submarine capable of carrying 24 cruise missiles and 24 torpedoes. She was one of the first vessels to be taken into Russian military service after the collapse of the Soviet Union, served for 5 years in the Northern Fleet before tragically sinking during an exercise into the depths of Barents sea on August 2000 with the loss of all hands. It was later discovered that she sunk due to series of explosions, first of which was most probably caused by the hydrogen peroxide used as a propellant in the old Soviet torpedoes and subsequently detonating kerosene and other armaments on board. While 23 of the 118 personnel survived the explosions, delayed rescue operations led to rest of the crew suffocating.
Even with this tragic story, or perhaps because of it, who doesn't want to have a nuclear submarine on the desk?
I think submarines are interesting. They are somewhat like mysterious underwater predators, gliding calmly below the surface in total silence, unseen and hardly detectable. Once I noticed the #MakeItFloat challenge I started thinking something different to participate with than regular boats so I decided to combine a little bit of history into the competition. Later when I figured out I could actually do this, I wanted to add more details and it kind of spiraled from a simple display model to fully functional RC vessel.
This is the second ever "multi part" model I've made and let's just say it's been a rough ride through Youtube tutorials and online manuals :) But I'm proud of what I've accomplished already in terms of learning. Honestly, I didn't think I'd get even the hull done when I started. I've also made lots of calculations for buoyancy and carrying capacity, this model does float and is able to move powered by a small motor (or dual motors), turn with rudder and stay in balance with the side planes. There is also a compartment for counterweights in the bow to further balance the vessel when motor and rudder controls are fitted to the stern.
The biggest challenges for me were, as mentioned above, first learning how to use the software properly to design such a complex model with lots of detail. Secondly I struggled with fitting all the RC components inside, as there really is not too much room in the hull and I wanted to keep the original dimensions so widening the hull wasn't an option. I also have zero experience of RC boats so figuring out how to make rudder turn etc were something that took me many hours to complete.
I also wanted to combine a few different materials to make it more reliable and at the same time more fun to build, so each opening in the hull is meant to be sealed with parts printed out from NinjaFlex or similar flexible material to keep water out from inside the hull.
19th Jul.Version 2.0 is out!
Dive! Dive! Dive! The newest revision allows you to add components necessary to make this thing go underwater. This was something I dreamed of accomplishing when I started this build, and now it's here. Diving mechanism is made as cheap as possible, consisting of 2 x 30ml medical syringes acting as a piston ballast, fitted with a small motor and a leadscrew to push/pull the plunger. Water intake comes from the bottom of the main hull.
Now it goes without saying but taking this vessel underwater is a task that requires lots of care in printing quality, sealing all the possible leaking points. As RC controlled you may also encounter some issues with radiowaves not penetrating deep enough to the water, so make sure your radio operates in a wavelength that can be used in submersible applications. Cheap-o alternative is to wire the RC components into a buoy and let that float on the water surface, connected to the submarines motors via wiring.
To make this dive, you need to carefully measure the weight of the whole assembly without water in the ballast, then fill in with coins or similar and measure the point where it sunk. Remove ~40g from the sinking point and you're golden with the ballast system filling in total of 60ml of water (~60g).
The files for this revision are available in a simple .zip file named as 2.0 DiveKit. All the rest of the parts are similar to v1.5 so it's easy to upgrade to this version even if you already started printing the 1.5. Main differences in the divekit are the mounting points for the ballast system, and removed missile bays from the main hull to get more room to fit battery etc inside the vessel if needed.
This is very experimental proof-of-concept build and v1.5 should be still considered as the default build, I just fail at version numbering ;) With this I will also remove the work-in-progress stamp from this project and consider this finally complete.
5th Jul. Updated files for the current revision.Version 1.5 is out!
Short intro video: https://www.youtube.com/watch?v=l3hakm56Ei0
This revision comes in two flavors! RC-version with all the interior parts for mounting electronics and a pure display version which has all the interior parts shaved off to save in printing time and materials while providing detailed model to be put on shelf.
Choose your pick and print away! All files are checked with netfabb, oriented and ready to print.
What's new:
Added lots of more details
Easier to print, easier to assemble!
Two versions: RC-ready and Display-only. Zip files provide easy way to download all the necessary files for either model with one click.
Pre-split taller parts to make them fit smaller build spaces.
Fixed many dimensions to match original Kursk with more precision.
Fixed many small gaps and too thin walls.
Tested with electronics, added servo mounts, finished pushrods, motor mounts etc.
Fixed missile bay hatch mounting.
Added PDF instructions for assembling.
Added fastening features for maintenance hatches.
Three different propeller types for the best thrust with whatever RPM your motor provides.
Stand for the model.
Added .STEP file for easier modification of the model.
And lots more!
20th Jun.Version 1.0
Intro video: https://www.youtube.com/watch?v=7JzcrmXRq10
Added datasheet with full measurements of cargo capacity and dimensions as jpeg. Testing was done by filling the hull with euro coins.
Optimal swimming depth is achieved by adding 9eur in 20cent coins + 1eur in 10cent coins. (295,79g in more logical units ;)
Vessel sunk after adding additional 100g weight (I ran out of coins) and 4 x 10cent coins. Total cargo weight that caused the sinking was therefore 408.09g
Mandatory obvious disclaimer:
Electricity + water do not mix. I'm not responsible for any damages or injuries caused. Please make sure that water is not leaking inside the model before fitting any electric components. If in doubt, at least enclose your electronics to small plastic bags or similar to prevent damage. You know, the obvious :)
Similar models
thingiverse
free

Customizeable RC Boat Hull by WDHerrington
...ust watch out for it. sense the wing can't be printed without supports i added the wing so you can print and add separately.
cg_trader
$49

3D Mini Dragon Submarine model
...n modern sci fi realtime personal underwater marine equipment vessel ship dive deep depth submersible deepflight watercraft other
cg_trader
$6

U-Ship
...y u ship underwatership water typhoon class sub boat project 941 missile ship marine weaponry navy watercraft military watercraft
3dwarehouse
free

Pattaya dive boat
...oat #boot #dive #diving #hull #ocean #pattaya #pattayascubanet #schiff #scuba #ship #snorkeling #tauchen #thailand #vessel #water
3d_export
$6
U-Ship
...r>this model can be applied to animated films, short films, virtual environments, augmented environments, 3-d games, and more.
thingiverse
free

RC sailboat by Donchuck
...d only to give you the measurements for the real one.... i'll post some photos as soon as i'll finish with the motors....
grabcad
free

Unmanned Underwater Vehicle- UUV MK1
...ully operational. feel free to modify or remix. created in autodesk inventor lt 2018. autodesk fusion360/ netfab. race reed 2021.
grabcad
free

Submarine
...submarine
grabcad
a mini-submarine which can float and dive underwater.
grabcad
free

Submarine Controlled by iPhone
...ust under the surface of the water with just a few mm of the roof breaking the surface... or can use a short floating rc antenna)
3dwarehouse
free

Kursk Russian submarine
...kursk russian submarine
3dwarehouse
a russian submarine named kursk class typhoon #kursk #russian_navy #submarine #typhoon
Ceravyn
thingiverse
free

Volvo Redblock Additional Parts by Ceravyn
... of them may be easier to print in multiple cuts. use your own judgement since you know the best what your printer is capable of.
thingiverse
free

Stand for Dead Space 2 marker by Ceravyn
...in the side for wiring. i wired mine to work from usb power. bottom lid can be secured with two m3 screws or just glued to place.
thingiverse
free
Blackhand's warhammer by Ceravyn
...handle.
the hammer head is printed from red translucent petg, rest is printed from pla. painted using citadel miniature paints.
thingiverse
free

Volvo Redblock thermostat by Ceravyn
...in_scaled.stl which is scaled to 40% to match the cylinder head printable and featuring thicker edges to make it easier to print.
thingiverse
free
Volvo Redblock distributor by Ceravyn
... be used with miniature model of the cylinder head. the scaled version also features above mentioned possibility to insert wires.
thingiverse
free

VW Kleinbus T2 by Ceravyn
...odel is not ready for rc but can be printed as a decoration model.
run the files through netfabb first if you intend to print it.
thingiverse
free

Pin tumbler lock by Ceravyn
...y thicker walls for the chambers in the cut area, that should improve the strength of the chamber walls and make printing easier.
thingiverse
free

Direct Drive extruder for E3D-v6 by Ceravyn
...asier. the original design is still valid if you want a "tight fit" extruder and have your printer calibrated properly.
thingiverse
free

Customized Mount Remix Left by shivinteger
...[7] thing url : http://www.thingiverse.com/thing:1131508 [7] thing author : ceravyn [7] thing licence : creative commons - attribution -...
Kursk
3d_export
$110

stug iii ausf g
...by june 1943 in preparation for the battle of kursk mountings for the schürzen proved to be inadequate, as...
3d_sky
free

Panorama of the city AFP_003
...panorama of the city afp_003 3dsky panorama of kursk environment panorama of the city, the roof 9-five storey...
3d_sky
free

Panorama of the city AFP_002
...panorama of the city afp_002 3dsky panorama of kursk environment panorama of the city. made from a hill,...
3d_sky
free

Panorama of the city
...panorama of the city 3dsky panorama of kursk environment panorama of the city, the roof 9-five storey...
3d_sky
free
Kyoto
...savior of the sea (in memory of the pp "kurskamp;quot;). ...
3d_sky
$8

German heavy tank Tiger I Ausf E Pz. VI
...modification relates to the period of fighting on the kursk summer 1943 year (operation "citadel"). a rotating turret at...
thingiverse
free

T70 light tank by Kpi1986
...tank by kpi1986 thingiverse mined from 3d warehouse ( https://3dwarehouse.sketchup.com/model/u81511b83-1daf-4482-ae98-eaeaf9681ad9/t70m-light-tank3-rd-tank-corpsbattle-of-kursk ) and reapired with makeprintable. scale 1:56 only a...
free3d
free

T70M light tank
...light tank free3d t70m light tank,3-rd tank corps,battle of kursk ...
cg_trader
$125

Kursk- Oscar Class
...car class
cg trader
kursk- oscar class 3d model, available in obj, mtl, tga, class kursk military, ready for 3d animation and ot
141
3d_export
$60
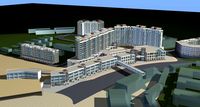
Architecture 141 3D Model
...lege campus max street landscape commercial building medical hospital offices
architecture 141 3d model lotusmodel 47784 3dexport
3ddd
$1

Conform / Gyro
...conform / gyro 3ddd conform http://www.conformcollection.se/products/viewprodukts/tabid/93/prodid/141language/en-us/catid/2/gyro_with_armrest.aspx size: height: 87 seatheight: 40 widht: 67 depth:...
3d_ocean
$16

Wicker Basket 01
...26 cm -height: 49 cm -width: 40 cm polygons: 141 778 vertices: 142 078 2 textures *.jpg (2048×2048) -...
3ddd
$1

BDLove Lamp by B.D Barcelona Design
...кресло-лампа от b.d barcelona design дизайнер: ross lovegrove размер: 141 x 120 x h.300 cм более подробная информация на...
3ddd
$1
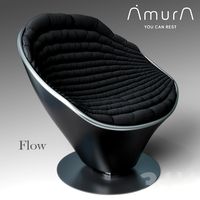
FLOW Armchair
...by antonio pio saracino (2014) polys:184 658 verts: 182 141 dimension: 814.09 x 666.32 x 810.5 xform: yes box...
3ddd
$1

МИККЕ компьютерный стол угловой.
...размеры макс ширина: 100 см глубина: 100 см высота: 141 ...
3ddd
$1

MALERBA. The 5th Avenue
...malerba. the 5th avenue. bed and nightstand. bed - mav-141 king size bed см 240х235х115h mav-121 queen size bed...
3ddd
$1

Crate&Barrel Haunted House
...набор декора из набора от фирмы crate & barrel 141 000...
3ddd
$1
KARE
...yellow 55x55cm -http://www.kare-design.com/ru/shop28085/products/catalog/product_detail/77393/311-135/2/ taberna display cabinet white 2 doors -http://www.kare-design.com/ru/shop28085/products/catalog/product_detail/78069/305-141 ...
3ddd
$1

Ralph Lauren THE HEIRESS CLUB CHAIR
...2013 3ds max 2010 fbx obj textures materials real sizehttp://www.ralphlaurenhome.com/products/furniture/item.aspx?haid=6&collid;=141amp;shaid;=&sort;=&itemid;=25195&phaid;=5 ...
K
3ddd
$1

Kohler Triton® Shelf-back double wristblade lever handle sink faucet with loose-key stops
... смеситель
медицинский (хирургический) смеситель
height 8-7/16"
length 7-5/8"
width 8"
k-7308-5a-cp
3d_ocean
$29

Assault rifle AK-74
...y russian designer mikhail kalashnikov. it uses a smaller 5.45×39mm cartridge, replacing the 7.62×39mm chambering of earlier k...
cg_studio
$49
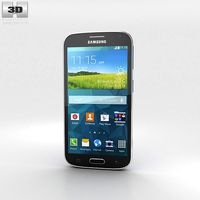
Samsung Galaxy K Zoom Blue3d model
...j .mb .lwo .fbx .c4d .3ds - samsung galaxy k zoom blue 3d model, royalty free license available, instant download after purchase.
3ddd
$1
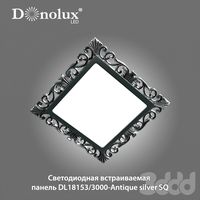
Светодиодная панель Donolux DL18153/3000
...античное серебро световой поток: 630 lm цветовая температура: 3000 k выполнена в литом корпусе. идеально впишется в любой классический...
3ddd
$1

Pioneer blu-ray disc player BDP-LX58-K
... воспроизведением 3d blu-ray , super audio cd/dvd-audio дисков, pqls и высококачественными аудиокомлектующими (черный)
bdp-lx58-k
3ddd
$1

Pioneer network audio player N-70A-K
... usb на передней панели, обработкой многобитного сигнала, usb цап и auto sound retriever (черный)
n-70a-k
пульт ду присутствует.
3ddd
$1

Модели дверей K-71GB_K71GB10
...риантах: с глухой филенкой и со стеклом).
для удобства все файлы разделены по папкам: 3d модели (2013г), файлы fbx, изображения.
3ddd
$1

Модели дверей K-72GF_K-74GF_K-80GF
...вленных фабрикой.
в архиве 3 типа дверей.
для удобства все файлы разделены по папкам: 3d модели (2013г), файлы fbx, изображения.
3ddd
$1

Актуальный дизайн, туалетный стол brazo
...дизайн". в комплект входит: стол туалетный brazо, стул brazo k зеркало virtuos настенное. сайт производителя:...
3ddd
$1

Модели дверей K-82GB5_K-91GB8
...риантах: с глухой филенкой и со стеклом).
для удобства все файлы разделены по папкам: 3d модели (2013г), файлы fbx, изображения.