Cults
WARBOTRON/MACHINE BOY VORTEX to IDW ROTORSTORM kit
by Cults
Last crawled date: 6 years, 1 month ago
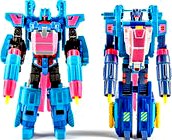
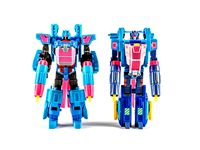
This kit is designed to convert Your Warbotron/Machine Boy Vortex to a IDW styled Rotorstorm.
I have changed transformation schematics (waist rotated 180 degrees to allow for an up-sweep of tail) plus some fiddling with arms. take a look a the pictures and You'll figure it out.
Thanks to my good friend Marcin Starzomski here
https://www.facebook.com/Printformers/?fref=ts
we have a great Rotorstorm head!
it has been slightly redesigned to fit inside during transformation, You just need to rotate it 180 degrees to face his back before transforming.
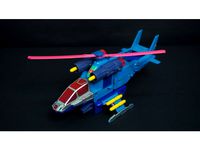
The tail transforms without detaching into the configuration shown in the pictures, the fins rotate 360 so the proper configuration can be reached without partsforming.
please be careful when installing the shoulder axle, I had mine printed slightly too tight and it snapped leaving half of it inside the socket. I STRONGLY SUGGEST TO PRINT THE AXLE IN HORIZONTAL POSITION, this way it will be much less prone to snapping in the worse possible way (when you print it vertically the circular layers will just snap off and will stay inside the body forcing you to drill them out, it's a pain, believe me)
the nose section will fit inside the back of the figure (under the flap), the hole in front is intended to house the original L-shaped connector (you need to remove it from the original nose/gun section). the long connecting rod that goes through it (and connects the front section that follow the nose) can be stored inside the body of the figure, underneath the nose section.
in order to remove the old canopy You need to knock the pin out with a small screwdriver and a hammer, then fit the canopy and squeeze the pin in with pliers.
the arm connectors go into holes in the arms and are used to store the split nose section in bot mode, and the wings in heli mode.
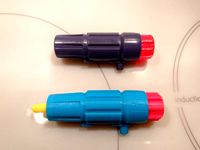
the smallest cylinder is intended to be installed on the bottom of the...butt, in one of the screw holes. it will prevent the helicopter from tipping back constantly. i ran out of energy before getting to landing gear, sorry :D
You have feet that nicely replace the originals. you need to play with them when transforming to get them out of the way of the tail. Warning - please mind the original balljoint pegs of the feet - if you print the feet in a way that the sockets are too tight You are very likely to brake the pegs, just as did I.
the knee cover fronts are to be detached and swapped during transformation, this way they will cover the back of the guns in alt mode and will also nicely continue the side line of the chopper.
you have to detach the back caps of the guns for transformation. there is no good place to store them - You can mount them on top in the gun holes in the flap, or underneath the wings in his hands.
all the files have been printed a couple of times now and are good to go, depending on your printers resolution and calibrations you will have to put some time in making the holes round and the tolerances sit, otherwise the prints will crack and get stress marks.
any questions please ask. i can write an assembly manual if required.
Ps - you need two shoulder connectors 01, two shoulder axles (please be very careful with those!), two rotor blades (obviously;), two feet, two arm connectors and two gun sets.
Enjoy!
I have changed transformation schematics (waist rotated 180 degrees to allow for an up-sweep of tail) plus some fiddling with arms. take a look a the pictures and You'll figure it out.
Thanks to my good friend Marcin Starzomski here
https://www.facebook.com/Printformers/?fref=ts
we have a great Rotorstorm head!
it has been slightly redesigned to fit inside during transformation, You just need to rotate it 180 degrees to face his back before transforming.
The tail transforms without detaching into the configuration shown in the pictures, the fins rotate 360 so the proper configuration can be reached without partsforming.
please be careful when installing the shoulder axle, I had mine printed slightly too tight and it snapped leaving half of it inside the socket. I STRONGLY SUGGEST TO PRINT THE AXLE IN HORIZONTAL POSITION, this way it will be much less prone to snapping in the worse possible way (when you print it vertically the circular layers will just snap off and will stay inside the body forcing you to drill them out, it's a pain, believe me)
the nose section will fit inside the back of the figure (under the flap), the hole in front is intended to house the original L-shaped connector (you need to remove it from the original nose/gun section). the long connecting rod that goes through it (and connects the front section that follow the nose) can be stored inside the body of the figure, underneath the nose section.
in order to remove the old canopy You need to knock the pin out with a small screwdriver and a hammer, then fit the canopy and squeeze the pin in with pliers.
the arm connectors go into holes in the arms and are used to store the split nose section in bot mode, and the wings in heli mode.
the smallest cylinder is intended to be installed on the bottom of the...butt, in one of the screw holes. it will prevent the helicopter from tipping back constantly. i ran out of energy before getting to landing gear, sorry :D
You have feet that nicely replace the originals. you need to play with them when transforming to get them out of the way of the tail. Warning - please mind the original balljoint pegs of the feet - if you print the feet in a way that the sockets are too tight You are very likely to brake the pegs, just as did I.
the knee cover fronts are to be detached and swapped during transformation, this way they will cover the back of the guns in alt mode and will also nicely continue the side line of the chopper.
you have to detach the back caps of the guns for transformation. there is no good place to store them - You can mount them on top in the gun holes in the flap, or underneath the wings in his hands.
all the files have been printed a couple of times now and are good to go, depending on your printers resolution and calibrations you will have to put some time in making the holes round and the tolerances sit, otherwise the prints will crack and get stress marks.
any questions please ask. i can write an assembly manual if required.
Ps - you need two shoulder connectors 01, two shoulder axles (please be very careful with those!), two rotor blades (obviously;), two feet, two arm connectors and two gun sets.
Enjoy!
Similar models
thingiverse
free
WARBOTRON/MACHINE BOY VORTEX to IDW ROTORSTORM kit by sickofyou
...doing cool stuff like that ;) if you want to contribute please leave a tip here or go to paypal.me/piotrsidoruk
thanks and enjoy!
thingiverse
free

WARBOTRON/MACHINE BOY Whirlwind aka Vortex Nose section by sickofyou
... arms and in the back of the figure (see pictures). you will need to use the original l shape connector to get it mounted. enjoy!
cults
free

TRANSFORMERS G1 ROTORSTORM ARTICULATION UPGRADE KIT
...>rotorstorm conversion kit.
also planing to recreate wings and tail-ends. need them to complete my junker :]
stay tuned!
cults
free

TRANSFORMERS G1 Rotorstorm GUN/ENGINE
...transformers g1 rotorstorm gun/engine
cults
transformers g1 rotorstorm gun/engine
transformers g1 rotorstorm gun/engine
cults
free

WARBOTRON/MACHINE BOY Whirlwind aka Vortex Nose section
...ose section
cults
warbotron/machine boy whirlwind aka vortex nose section
warbotron/machine boy whirlwind aka vortex nose section
thingiverse
free
TRANSFORMERS G1 Rotorstorm GUN/ENGINE by sickofyou
...does not include the spring loaded mechanism as the original. now you are one step closer to completing your rotorstorm :d
enjoy!
thingiverse
free

Contemptor Dread Shoulder Arm Connector by Karlel85
...tor by karlel85
thingiverse
arm connector for original forgeworld contemptor dreads to printed weapon arms with 2mm magnet hole.
thingiverse
free

Xmas Tree by WrangerMan
... 4 way connector and have a simpler tree.
i recommend printing the star is glow in the dark filament it makes it nice at night!
thingiverse
free

Shoulder for Warbotron Brawl by crippy59
... for warbotron brawl by crippy59
thingiverse
this is the shoulder replacement part for warbotron brawl. it adds an extra joint.
thingiverse
free

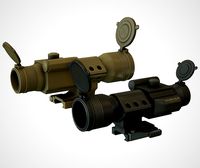
Turbine Weapons for Rotorstorm by jesslynmakesrobots
...ut. i recommend printing them upright with supports inside the cavity. don't forget to print two missiles and two end pieces!
Rotorstorm
thingiverse
free
Turbine Weapons for Rotorstorm by jesslynmakesrobots
...ut. i recommend printing them upright with supports inside the cavity. don't forget to print two missiles and two end pieces!
thingiverse
free

Transformers Generations Selects Rotorstorm Gun by larkinslair
...se page here: https://www.thingiverse.com/sickofyou/designs and his facebook page here: https://www.facebook.com/sickofyoucustoms
thingiverse
free
Transformer G1 Rotorstorm accessories
... the launcher and can be stored on the pegs.
i used devil design bright yellow and pink utrat for the rotor blades . have fun :)
thingiverse
free
TRANSFORMERS G1 Rotorstorm GUN/ENGINE by sickofyou
...does not include the spring loaded mechanism as the original. now you are one step closer to completing your rotorstorm :d
enjoy!
thingiverse
free
WARBOTRON/MACHINE BOY VORTEX to IDW ROTORSTORM kit by sickofyou
...doing cool stuff like that ;) if you want to contribute please leave a tip here or go to paypal.me/piotrsidoruk
thanks and enjoy!
thingiverse
free

TRANSFORMERS G1 ROTORSTORM REBUILD SET WITH ARTICULATION UPGRADE KIT by sickofyou
...doing cool stuff like that ;) if you want to contribute please leave a tip here or go to paypal.me/piotrsidoruk
thanks and enjoy!
cults
free
TRANSFORMERS G1 ROTORSTORM ARTICULATION UPGRADE KIT
...>rotorstorm conversion kit.
also planing to recreate wings and tail-ends. need them to complete my junker :]
stay tuned!
cults
free
TRANSFORMERS G1 Rotorstorm GUN/ENGINE
...transformers g1 rotorstorm gun/engine
cults
transformers g1 rotorstorm gun/engine
transformers g1 rotorstorm gun/engine
Warbotron
thingiverse
free

Transformers Jinbao Warbotron (Not Bruticus) Mid section riser
... blu resin hollowed with a 4mm wall thickness, also tried elegoos abs like material but it was to brittle and broke so be warned.
thingiverse
free
WARBOTRON/MACHINE BOY Whirlwind aka Vortex Nose section by sickofyou
... arms and in the back of the figure (see pictures). you will need to use the original l shape connector to get it mounted. enjoy!
thingiverse
free

WARBOTRON/Machine Boy Vortex knee replacement by sickofyou
...int below te knee - well - wonder no more, it doesn't.
in case you snap it, like i did, here is the replacement part. enjoy!
thingiverse
free
WARBOTRON/MACHINE BOY VORTEX to IDW ROTORSTORM kit by sickofyou
...doing cool stuff like that ;) if you want to contribute please leave a tip here or go to paypal.me/piotrsidoruk
thanks and enjoy!
thingiverse
free

Shoulder for OS Warbotron Brawl by DemonWraith
... the parts together. i used a bit of plastic runner, but it is designed to use a pin the same diameter as the stock shoulder pin.
thingiverse
free
Shoulder for Warbotron Brawl by crippy59
... for warbotron brawl by crippy59
thingiverse
this is the shoulder replacement part for warbotron brawl. it adds an extra joint.
cults
free
TRANSFORMERS G1 ROTORSTORM ARTICULATION UPGRADE KIT
...peg for the head you can find in the warbotron>rotorstorm conversion kit. also planing to recreate wings and tail-ends....
cults
free
WARBOTRON/MACHINE BOY Whirlwind aka Vortex Nose section
...ose section
cults
warbotron/machine boy whirlwind aka vortex nose section
warbotron/machine boy whirlwind aka vortex nose section
cults
free

WARBOTRON/Machine Boy Vortex knee replacement
...ine boy vortex knee replacement
cults
warbotron/machine boy vortex knee replacement
warbotron/machine boy vortex knee replacement
Idw
3d_export
$11

nightlight vintage wooden sleeping lamp
...*.sldprt *.slddrw *.sldasm (native)<br>2. autodesk inventor *.ipt *.iam *.ipn *.idw *.dwg<br>3. 3ds max: *.max<br>4. rhinoceros: *.3dm<br>5. sketchup: *.skp<br>6. blender:...
3d_export
$17

belt grinder sander buffer edge polishing machine
...formats:<br>1. autodesk inventor *.ipt *.iam *.ipn *.idw *.dwg (native)<br>2. solidwrks: *.sldprt *.slddrw *.sldasm<br>3. 3ds max: *.max<br>4. rhinoceros: *.3dm<br>5. sketchup:...
3d_export
$13

liquid bottle glue packaging 3d
...*.slddrw *.sldasm (native) 2. autodesk inventor *.ipt *.iam *.ipn *.idw *.dwg 3. 3ds max: *max 4. rhinoceros: *.3dm 5....
3d_export
$21

digital thermometer lcd display wireless thermocouple peak meter
...*.slddrw *.sldasm (native) 2. autodesk inventor *.ipt *.iam *.ipn *.idw *.dwg 3. 3ds max: *max 4. rhinoceros: *.3dm 5....
3d_export
$11

vacuum degassing chamber and pump kit
...*.slddrw *.sldasm (native) 2. autodesk inventor *.ipt *.iam *.ipn *.idw *.dwg 3. 3ds max: *max 4. rhinoceros: *.3dm 5....
3d_export
$13

swivel casters rubber wheels steel top plate ball bearings
...*.slddrw *.sldasm (native) 2. autodesk inventor *.ipt *.iam *.ipn *.idw *.dwg 3. 3ds max: *max 4. rhinoceros: *3dm 5....
3d_export
$13

harley davidson emblem logo badge symbol icon hdc club
...*.slddrw *.sldasm (native) 2. autodesk inventor *.ipt *.iam *.ipn *.idw *.dwg 3. 3ds max: *.max 4. rhinoceros: *.3dm 5....
3d_export
$17

2 in 1 travel snack drink cup bottle container lid with straw
...*.sldprt *.slddrw *.sldasm (native)<br>2. autodesk inventor *.ipt *.iam *.ipn *.idw *.dwg<br>3. 3ds max: *.max<br>4. rhinoceros: *.3dm<br>5. sketchup: *.skp<br>6. blender:...
turbosquid
$25

crusher Machine
...model crusher machine for download as ipt, iam, and idw on turbosquid: 3d models for games, architecture, videos....
turbosquid
$3

Smartphone tripod adapter
...adapter for download as iam, ipt, ipt, stl, obj, idw and ipt on turbosquid: 3d models for games, architecture,...
Vortex
3ddd
$1

MAISONS Miroir Vortex
...maisons miroir vortex
3ddd
maisons
dimensions (cm) : h 80 x l 80 x p 4
poids : 9 kg
3d_ocean
$15

26 x Particle Textures Pack
...lens magic spell particle particles smoke snow texture vfx vortex 26 – 512×512 particle maps for use in particle...
3d_ocean
$89

Chery Tiggo (J11) 2013
...crossover dr5 j11 mvm ruihu speranza suv tiggo tingo vortex x33 the 3d model was created on real car...
3d_ocean
$4

Realistic Vortex Splash
... in realflow and the mesh was created by the 3ds max plugin frost. you are given the choice of two 2 levels of detail . low de...
3d_ocean
$15
Red Dot Scope
...glass gun lowpoly military optics optimized scope tactical unity vortex weapon the vortex optics red dot scope. game ready...
cg_studio
$99

Chery Tiggo (J11) 20133d model
...tiggo china crossover dr5 j11 mvm ruihu speranza tingo vortex x33 .3ds .c4d .fbx .lwo .max .mb .obj -...
3ddd
$1

Prota Romana VORTEX CHANDELIER MCL 30
...x 2014
3ds max 2011
fbx
obj
textures
materials
real sizehttp://www.portaromana.co.uk/uploads/productfiles/mcl30-gld.pdf
3ddd
free
Придверный коврик "Vortex" 60 см х 40 см
...придверный коврик "vortex" 60 см х 40 см
3ddd
ковер
придверный коврик "vortex" 60 см х 40 см
3d_export
$9

Vortex logo 3D Model
...hicle part of auto transport 3d model logo emblem detailed high quality badge marque
vortex logo 3d model rmodeler 61547 3dexport
3d_export
$169

Chery Tiggo J11 with HQ interior 2013 3D Model
...model 3dexport chery tiggo j11 ruihu mvm x33 speranza vortex tingo dr5 hq interior 2006 2007 2008 2009 2010...
Boy
3d_export
$29
MuscularMohit 3D Model
...hair texture teeth eye skin real man muscular male boy leather clothey cloth coloured dress poly muscularmohit 3d model...
3ddd
$1
table d'appoint design simple
...рнальный , круглый
table d'appoint design simple
couleur: noir
matière: bois laqué
3d_ocean
$15

3d human head v1
...3d human head v1 3docean 3d 3ds anatomy bald boy character face guy hd head hi hq human male...
3d_ocean
$29
Cartoon Character Bhuli
...cartoon character bhuli 3docean anime body boy cartoon character child children cloth clothing comics dress fantasy...
3d_ocean
$29

Cartoon Character Chuli
...cartoon character chuli 3docean anime body boy cartoon character child children cloth clothing comics dress fantasy...
3d_ocean
$29

Low Poly Scout team
...low poly scout team 3docean boy forest girl man men people scout team women low...
3d_ocean
$5

TK1-003 Fast March Walk
...tk1-003 fast march walk 3docean animation baby bip boy bvh children kid march tk1-003 toon walk toon kid...
3d_ocean
$8
Man
...man 3docean base boy boy human humen low-poly man men mesh people person rigged...
3d_export
$10

PLAYGROUND SET 3D Model
...de juegos infantil childrens play zone park parque ni?os boy playground set 3d model download .c4d .max .obj .fbx...
3d_export
$49

Cartoon Boy 3D Model
...aracter fbx characters people obj
cartoon boy 3d model download .c4d .max .obj .fbx .ma .lwo .3ds .3dm .stl niyoo 111600 3dexport
Kit
3d_ocean
$5

Streets and highways construction kit
...make city streets. roads has the pavement. models low poly and ready to use in games. texture size in render images 2048×2048,...
3d_ocean
$29

Proto Cemetery Set
...they are meant to be used as a construction kit for rapid game prototyping. the blocks are real world...
3d_export
$12

Grapes Single Fruit Bunches and Model Kit 3D Model
...
grapes single fruit bunches and model kit 3d model download .c4d .max .obj .fbx .ma .lwo .3ds .3dm .stl martin3d 108952 3dexport
3d_export
$15

Drum Stand 3D Model
...holder snare rim hardware modern orchestra music band drumkit kit rack drum stand 3d model download .c4d .max .obj...
3d_export
$10

Wizard kit 3D Model
...at broom glasses spell globe
wizard kit 3d model download .c4d .max .obj .fbx .ma .lwo .3ds .3dm .stl emadnabil27 109521 3dexport
3d_ocean
$35
Prototyper Desert Set
...they are meant to be used as a construction kit for rapid game prototyping. the blocks are real world...
3ddd
$1

Nomades Authentic Ceilin Lights
...decorative porcelain, glass or wooden elements - an electrification kit khaki, black or transparent, according tot the models -...
archive3d
free

Drum 3D Model
...drum 3d model archive3d drum musical instrument tambour drum kit drum conga n310116 - 3d model (*.gsm+*.3ds) for interior...
cg_studio
$30
Scifi Interior Construction Kit (Basic)3d model
...bx .dae .3ds - scifi interior construction kit (basic) 3d model, royalty free license available, instant download after purchase.
cg_studio
$25
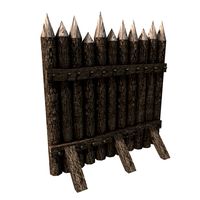
Stockade construction kit3d model
...ds .obj .mb .max .fbx .c4d - stockade construction kit 3d model, royalty free license available, instant download after purchase.
Machine
3d_export
$35

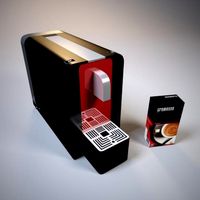
Coffee Machine Franke FM800 3D Model
...dexport
coffee machine franke fm800 foammaster kitchen appliance
coffee machine franke fm800 3d model pluscreative 90612 3dexport
3d_export
$29
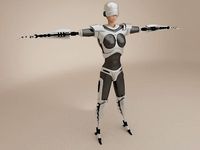
Female cyborg 3D Model
...cyborg 3d model 3dexport robot droid humanoid mecha bot machine female woman bionic metalic android human science engineering technology...
3d_export
$5
Coffee machine 3D Model
... model
3dexport
coffe machine cafe coffee cremesso nespresso espresso latte capsule
coffee machine 3d model gizart 46710 3dexport
3d_export
$10
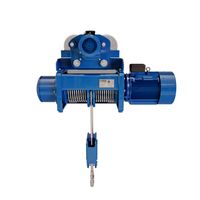
Crane Hoist Podem 3D Model
...hoist podem 3d model 3dexport crane loader lift work machine hoist crane hoist podem 3d model genkot27 68607...
3d_export
$20
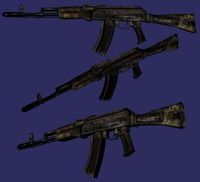
AK103 3D Model
...ak103 3d model 3dexport ak ak103 ak-103 assault-rifle rifle machinegun kalashnikov fps first-person-shooter ak103 3d model urgo 73807...
3d_export
$10
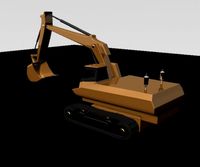
Digger 3D Model
...digger 3d model 3dexport digger dig machine work risko digger 3d model risko 73924...
3d_export
$39

Scifi interior 3D Model
...interior industrial machines scifi horror fantasy science fiction sci-fi machiney factory highly detailed versatile scene altar hologram metal scifi...
3d_export
$10

Swing Bolts DIN 444 M8 AutoCAD 2007 2010 3D Model
...hardware sling swing industry supply swivel bolts lifting 9037fastener machine stainless eyebolts swing bolts din 444 m8 autocad 2007...
3d_export
$5

Bearings 3D Model
...industry factory technics technology car auto rotation spare part machine driving metal nickel bearings 3d model dmitry87 49638...
3d_export
$8
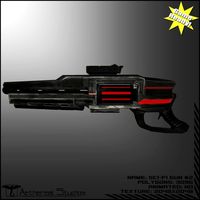
SciFi Gun 2 3D Model
...scifi gun 2 3d model 3dexport weapon machine gun rifle sci-fi alien space plasma laser energy package...